You can manage the following aspects of your Covata user account through the My Account feature of Safe Share:
You can also manage a list of contacts (relating to your account). Your contacts list makes it easier to share items with a regular set of people.
To access the 'My Account' feature:
- Sign in to the Safe Share web application.
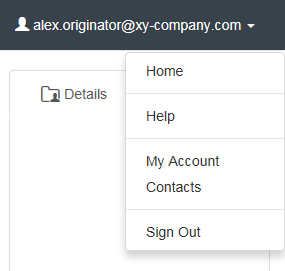
- Click your email address at the top-right of the page and choose My Account from the drop-down menu:
Updating your account details
To update your personal details:
- Access the My Account feature.
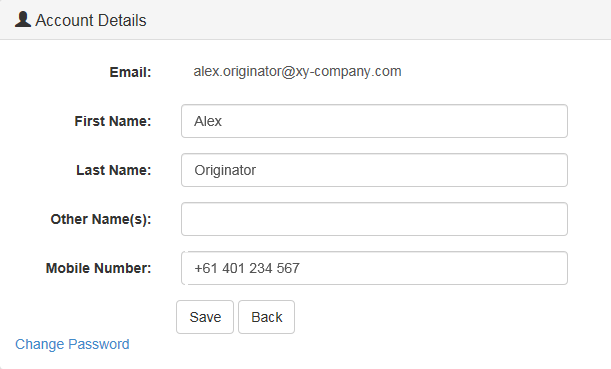
- In the Account Details section, update any of the following fields as required:
-
First Name - e.g. your given name or nickname
-
Last name - e.g. your surname or family name
-
Other Name(s) - e.g. a middle or other given name - this value is only used for Covata user accounts which were created from a user directory external to the Covata Platform (i.e. an LDAP account type)
-
Mobile Number - this must include the country calling code and plus (+) sign prefix
Note: Updating the First Name, Last Name and Mobile Number also updates these fields in Covata Administration, which can be accessed by Covata Platform administrators. Refer to the Covata Platform Administrator's Guide for more information.
- Click the Save button and the updates to your personal details are saved.
Note: If your Covata user account was created from an external user directory (i.e. you have an LDAP account type), then you will not be able to change any of the details above through Safe Share. To change these details, please contact your Covata Platform administrator or the administrator responsible for managing LDAP/the user directory for your account.
Changing your password
To change your password:
- Access the My Account feature.
- In the Account Details section, click the Change password link.
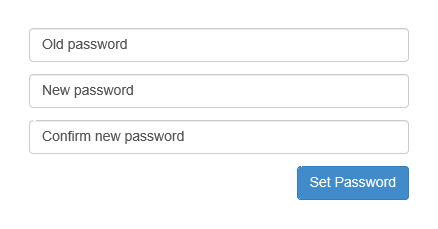
- Specify your old password and then your new password twice (once again to confirm it):
- Click the Set Password button and your Covata user account's password is now changed.
Note: If your Covata user account was created from a user directory which is external to the Covata Platform (i.e. you have an LDAP account type), then you will not be able to change your password through Safe Share. To change your password, please contact your Covata Platform administrator or the administrator responsible for managing LDAP or the user directory of your account.
Viewing your storage usage and quota
Information about your storage usage and quota (managed by the Covata Platform) is available in the footer area of any Safe Share Compatibility Mode for Web page.
Note: This section is not available if your account does not have the Originator role. This role provides your account with the ability to upload and store content (to your own storage space) securely with Safe Share.
To view information about your storage usage and quota:
- Sign in to the Safe Share web application.
- At the footer of any page, the following information about your user account's storage usage and quota is indicated:
-
Usage - The amount of storage space that your account currently uses (in megabytes).
-
Percentage usage - The percentage of your quota that your account's usage occupies. This percentage is also indicated visually at the top of the Your Plan section.
Tip: If your percentage usage approaches 100%, either remove some of your own secure content or ask your Covata Platform administrator to switch your plan to one with a larger quota.
-
Quota - The amount of storage space (in gigabytes) allocated to your account, by virtue of your account's plan.
Modifying your email notification preferences
You can reduce the frequency of your Covata notifications by modifying your email notification preferences from the default of one email for every file or folder that is shared with you, to a periodic digest of all files and folders that have been shared with you over a set period.
To modify your email notification preferences:
- Access the My Account feature.
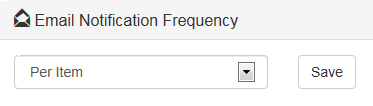
- Scroll down to the Email Notification Frequency section and choose:
-
Per Item to receive an email notification for every file or folder that is shared with you.
-
Daily to receive a daily email notification of all files and folders that were shared with you over the last day.
-
Weekly to receive a weekly email notification of all files and folders that were shared with you over the last week.
-
None to not receive any email notifications when a file or folder is shared with you.
- Click the Save button and the updates to your email notification preferences are saved.
Managing your contacts
Using the Safe Share Compatibility Mode for Web, you can add, edit or delete personal contacts through Safe Share's Contacts feature, which allows you to store the email addresses of people you regularly share content with.
This feature can make it easier to share content with other people, by first opening the Contacts feature in a separate tab and then when sharing your own content, copying email address(es) from the Contacts page to the Share page.
Tip: Whenever you share your own content with other people through a modern web browser, their email addresses are automatically added to your list of Contacts.
To access the 'Contacts' feature:
- Sign in to the Safe Share web application.
- Click your email address at the top-right of the page and choose Contacts from the drop-down menu:
To add a new 'Contact':
- Access the Contacts feature.
- Click the top-left New Contact button.
- On the resulting Contact page, specify a mandatory Email address and optional First name and Last name fields.
- Click Save to add your new Contact.
To edit an existing 'Contact':
- Access the Contacts feature.
- Click the Edit link associated with the Contact to be edited.
- On the resulting Contact page, edit the mandatory Email address and optional First name and Last name fields as required.
- Click Save to update your existing Contact.
To delete an existing 'Contact':
- Access the Contacts feature.
- Click the Delete link associated with the Contact to be deleted.
The Contact is deleted from the list.