An 'organization' is a self-contained unit representing an organization's (or a department's) access to resources on a Covata Platform instance.
- An organization is a self-contained unit, meaning that the creation, sharing and manipulation of files/Secure Objects * and folders/collections is handled solely within the scope of the organization itself. Organizations provide the Covata Platform with multitenancy capabilities, whereby each organization represents an individual 'tenant'.
- A Covata user within an organization has access to Secure Objects/collections based on whether the user either owns these items or is a collaborator on them. For more information about Covata users within an organization, see Administering users within an organization in the Safe Share Organization Administration section of this guide.
- Any Covata user may be a member of multiple organizations on a Covata Platform instance. In such cases, the Covata user's account is re-used across all these organizations. However, the Covata Platform treats all Secure Objects within one organization (and any Covata user's access to these Secure Objects) completely independently of the Secure Objects within another organization.
* A Secure Object is defined as Covata-encrypted data that has been registered on the Covata Platform, along with the metadata associated with this encrypted data. For more information about Secure Objects, see Administering files in the Safe Share Organization Administration section of this guide.
When first using Safe Share Administration on either a newly-installed Covata Platform instance or one which has been upgraded from version 2.16 (or earlier), one organization is present:
- On newly-installed Covata Platform instances, this organization:
- is initially named Default without any Covata users or Secure Object data, and
- has no Organization administrator set.
- On upgraded Covata Platform instances:
- This organization is also initially named Default but instead has all Covata users and their Secure Object data from the previous Covata Platform version.
- Any Covata users who had the System administrator role in the previous Covata Platform version will have this role replaced by both:
- No contact person is set for the Default organization.
The name of an organization can be changed/edited as well as the organization's initial Organization administrator/contact person. However, once the Organization administrator/contact person has been set, it is no longer possible to change this value from within Safe Share Administration.
Administering an organization
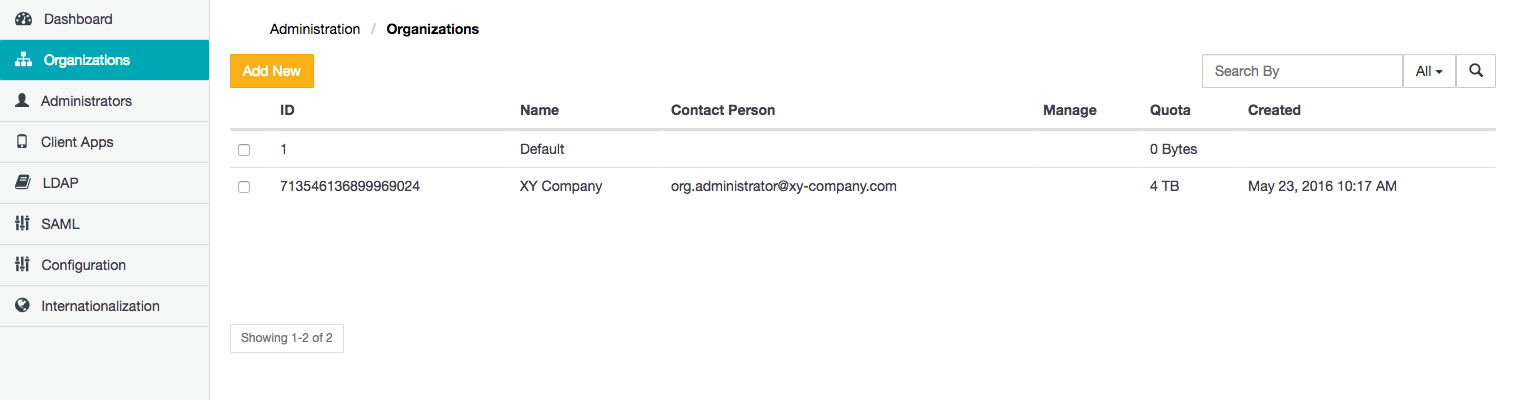
The Organizations page of Safe Share Administration (above) allows:
Adding a new organization
Important: Before continuing ...
- If you intend to add users to your Covata Platform instance from an LDAP server/user directory, then do not add any organizations. If more than one organization is present - for example, any more organizations than the one initially named Default on newly-installed or upgraded Covata Platform instances, then the LDAP configuration feature is disabled.
- Similarly, if you add an LDAP connection or one or more LDAP connections already exist, then the ability to add any new organizations to your Covata Platform instance becomes permanently disabled - i.e. the presence of any configured LDAP connection permanently disables this feature.
To add a new organization to the Covata Platform:
- Sign in to Safe Share Administration.
- Click the Organizations option on the left of the Safe Share Administration interface to open the Organizations page.
- Click the Add New button.
- In the Add new organization dialog box, specify the:
- Organization Name - The value of this field is the name of the organization shown to Covata users in Safe Share applications.
- Quota (GB) - The value of the quota (in gigabytes) granted to this organization.
Note: The total quota for all Covata users in this organization (who have a quota) is restricted by the value specified here. For more information about Covata user's storage quotas, see Managing users' storage quotas through plans in the Safe Share Organization Administration section of this guide.
- Administrator - The email address of the initial Organization administrator of this organization. To make yourself the Organization administrator of this organization, specify your Safe Share administrator account's email address here. Once this email address has been set:
- it cannot be changed by any Safe Share administrator (unless they are also an Organization administrator of this organization) and
- after adding this organization, upon subsequently editing it, this field's label indicates Contact Person and its value cannot be modified through Safe Share Administration. Only an Organization administrator of this organization can later change this value through the properties page of Safe Share Organization Administration.
- Click Save and the new organization will appear as a new entry on the Organizations page.
Tips:
- If you made yourself the Organization administrator of this organization, you can access its Safe Share Organization Administration interface by clicking the organization's Manage button (in the Manage column).
- If you have added this organization by mistake, it can be removed (below).
Finding existing organizations
As more organizations are added to the Covata Platform, it can become difficult to locate specific organizations through the Organizations page of Safe Share Administration. The Organizations page therefore offers features to help you locate specific organizations more rapidly.
To locate specific organizations on the Covata Platform:
- Sign in to Safe Share Administration.
- Click the Organizations option on the left of the Safe Share Administration interface to open the Organizations page.
- Use either of the following features to find a specific organization (or subset of these organizations):
- Filter organizations - In the Search By box (right of the Organizations page), begin typing a series of characters contained in any of the organizations' Name or Contact Person fields, followed by the 'Enter/Return' key. This filters the list of organizations on the Covata Platform to those whose Name or Contact Person contains the subset of characters entered into the Search By box.
By default, the Name or Contact Person fields fields are used for filtering (i.e. All), although filtering can be restricted to just one of these fields using the adjacent drop-down.
- Navigate to specific organizations - If available, use the page navigation buttons (lower-right of the Organizations page).
Tip: You can also sort organizations on the Organizations page by clicking the linked name (in the column header) of the field by which you would like to sort your organizations:
- Clicking a linked field name multiple times toggles between sorting the organizations (according to that field) in ascending and descending order.
- To revert back to the natural ordering of organizations in the list, simply refresh the page.
Editing an existing organization
Tip: Use this procedure to specify the initial Organization administrator of the Default organization.
To edit an existing organization:
- Sign in to Safe Share Administration.
- Click the Organizations option on the left of the Safe Share Administration interface to open the Organizations page.
- Select the left check box of the organization to be edited and click the Edit button.
- In the Edit organization dialog box, modify the:
-
Organization Name - The value of this field is the name of the organization shown to Covata users in Safe Share (and other client) applications.
-
Quota (GB) - The value of the quota (in gigabytes) granted to this organization.
Note: The total quota for all Covata users in this organization (who have a quota) is restricted by the value specified here. For more information about Covata user's storage quotas, see Managing users' storage quotas through plans in the Safe Share Organization Administration section of this guide.
The last field on this dialog box may differ depending on the organization you are editing and its current state:
- If you are editing any organization whose Organization administrator has already been specified (i.e. every organization other than the Default), then this field (labeled Contact Person) indicates a non-editable email address, which is either:
- If you are editing the initially-named Default organization, then this editable field is labeled either of the following:
- Administrator on newly-installed Covata Platform instances because an Organization administrator of Default has not yet been set. You must specify an Organization administrator's email address here to save your changes to the other fields (above). For important information about editing this field before saving your changes, see step 4 of Adding a new organization (above).
Note: You can make yourself the Organization administrator of the Default organization by specifying your Safe Share administrator account's email address here.
- Contact Person on upgraded Covata Platform instances. You must specify the email address of a contact person, for example, that of one of the existing Organization administrators in Default to save your changes to the other fields (above). Be aware that the contact person's email address does not have to be that of an Organization administrator or any other Covata user in this organization.
- Click Save and the organization's details are updated.
Removing an organization
This procedure is intended for Safe Share administrators who have added one or more organizations by mistake and would then like to remove them (soon after their creation).
Removing organizations can be useful:
- If you have accidentally disabled the LDAP configuration feature (by adding new organizations), since you can regain access to LDAP configuration by removing all organizations except the one you wish to use.
- For de-cluttering the Organizations page.
Note: Removing an organization is not possible if any Covata users with the Originator, Collaborator or Ad hoc user roles exist within this organization. For more information about these roles, see Administering users within an organization in the Safe Share Organization Administration section of this guide.
To remove an organization:
- Sign in to Safe Share Administration.
- Click the Organizations option on the left of the Safe Share Administration interface to open the Organizations page.
- Select the left check box of the organization to be removed and click the Remove button. You are prompted to confirm this removal and upon clicking Yes, the organization is removed.
Notes:
- If you receive a 'This organization cannot be removed...' error message, then (as mentioned above) it is likely that one of the organization's Organization administrators has granted at least one Covata user (which could include themselves) the Originator or Collaborator role. To resolve this issue, request that any Organization administrator of this organization (who also does not have either the Originator or Collaborator role) remove all Covata users from their organization before you remove this organization.
- If the organization has only one Covata user who themselves has the Organization administrator role and either the Originator or Collaborator roles (neither of which can be removed from a user), then this Organization administrator would need to do the following to allow their Safe Share administrator to remove their organization:
- Create another Covata user account with the Organization administrator role only.
- Sign in to Safe Share Organization Administration using this new account and remove their original Organization administrator account (i.e. with the additional Originator or Collaborator role).
- Inform the Safe Share administrator that their organization can now be removed.