The Files page allows Covata Platform administrators to search all files encrypted using Covata technologies through the Covata Platform. Using this page, the following activities can be performed on any of these files (also known as Secure Objects**):
Disable it - disabling a file/Secure Object prevents access to any aspect of it (including access by its owner) from:
A Covata Safe Share application, or
Another client application that uses the Covata Platform's API.
** A Secure Object is defined by the following:
Covata-encrypted data that has been registered on the Covata Platform. Note: Covata-encrypted data is data from a file or stream, which has then been encrypted either:
Using Covata technologies (i.e. with a Covata Safe Share product or another client application that utilizes the Covata Platform's API for encryption via the Content Service), or
According to Covata's encryption requirements (i.e. a client application with its own encryption implementation). For more information about Covata's encryption requirements, see the Required parameters on POST section on the <content-service>/api/v1/objects/{objectId}/contents page of the Covata API documentation .
The metadata associated with this encrypted data. Some of this metadata can be determined by the creator/owner of the Secure Object.
Finding Secure Objects
Of all Secure Objects that have been created on your Covata Platform instance, it is possible to search and locate specific Secure Objects by their Name (e.g. file name), their owner's Email address, First Name or Last Name, or by the Secure Object's ID.
To locate specific Secure Objects on the Covata Platform:
Use either of the following features to find a specific Secure Object (or subset of Secure Objects):
Filter Secure Objects - In the Search by... box (right of the Files page), begin typing a series of characters contained in any of the Secure Objects' Id, Name or Ownerfields, which also includes the owner's first and last names. This filters the list of Secure Objects on the Covata Platform to those whose Id, Name, or Owner's Email, First Name or Last Name contains the subset of characters entered into the Search by... box.
By default, the Id, Name or Owner (including the Email, First Name or Last Name) fields are used for filtering (i.e. All), although filtering can be restricted to just one of these fields using the adjacent drop-down.
Navigate to specific Secure Objects - Use the page navigation buttons (lower-right of the Files page), which work in conjunction with the adjacent 25/50/75/100 items per page dropdown.
Tip: You can also sort Secure Objects on the Files page by clicking the linked name (in the column header) of the field by which you would like to sort your Secure Objects:
Clicking a linked field name multiple times toggles between sorting the Secure Objects (according to that field) in ascending and descending order.
To revert back to the natural ordering of Secure Objects in the list, simply refresh the page.
A Secure Object's fields
Each Secure Object which has been created on the Covata Platform is associated with its own metadata. Some of this metadata is exposed through the Files page and can be used for finding a Secure Object.
Field
Description
Id
The unique identifier (ID) generated for each Secure Object created on the Covata Platform.
Name
The name of the Secure Object. If a Secure Object was created through a Covata Safe Share application (by uploading a file to storage through a Safe Share application), then the name of the Secure Object is the file's name itself.
Owner
The email address of the Covata user who currently owns the Secure Object. If the ownership of this Secure Object has not been transferred to a different Covata user, then the owner of the Secure Object (and hence this email address) will also be the same as the Covata user who created this Secure Object. A Secure Object's creator is the Covata user:
Who was signed in to a Safe Share application when they uploaded the Secure Object's file to storage managed by the Covata Platform's Content Service.
Whose account was authenticated to the Covata Platform when the Secure Object was created through a client application (utilizing the Covata Platform's API).
Created
The local date and time of when the Secure Object was created.
Modified
The local date and time when the Secure Object was last modified by its owner. A Secure Object's date/time displayed in this field will be updated whenever the owner of this Secure Object modifies:
The collaborators with whom the Secure Object is shared.
The Secure Object's access controls - changes to when the Secure Object can be accessed, or whether or not the Secure Object's data can be printed/downloaded.
The Secure Object's metadata (including location) - for example, changes to the Secure Object's name or its parent folder/collection.
Status
The current status of the Secure Object, which could be any of the following values:
Created - indicates that the Secure Object was created successfully. This means that the Secure Object's data was successfully encrypted and that the Secure Object itself can be shared with other people, as well as have its access controls, name or location modified.
Incomplete - indicates one of two things, depending on the type of client application creating the Secure Object:
A Covata Safe Share application:
Is currently in the process of creating the Secure Object (i.e. encrypting its data) and uploading this data to storage (via the Covata Platform's Content Service). Once these processes are complete, the Secure Object's status changes to Created. or
Was in the process of creating the Secure Object or uploading its data to storage via the Content Service, but one of these processes failed. In such a scenario, the Secure Object's status remains Incomplete.
Regardless of these scenarios, an Incomplete Secure Object created through a Covata Safe Share application cannot:
Be shared with other people.
Have its access controls, name or location modified.
A client application (using the Covata Platform's API) initialized a new Secure Object (creating a Secure Object whose status is Incomplete) but did not update it (i.e. to encrypt its data and 'complete' the Secure Object, which would change the Secure Object's status to Created upon success). In such a scenario, the client application could still perform the following actions on an Incomplete Secure Object:
Retrieve the Secure Object from the Covata Platform (through its ID),
Share the Secure Object with other people, and/or
Modify the Secure Object's access controls, name or location.
Deleted - indicates that the Secure Object has been deleted by its owner. As a result, the Secure Object is no longer accessible to any Covata user, regardless of whether the Secure Object is being accessed through a Covata Safe Share application or another client application (utilizing the Covata Platform's API).
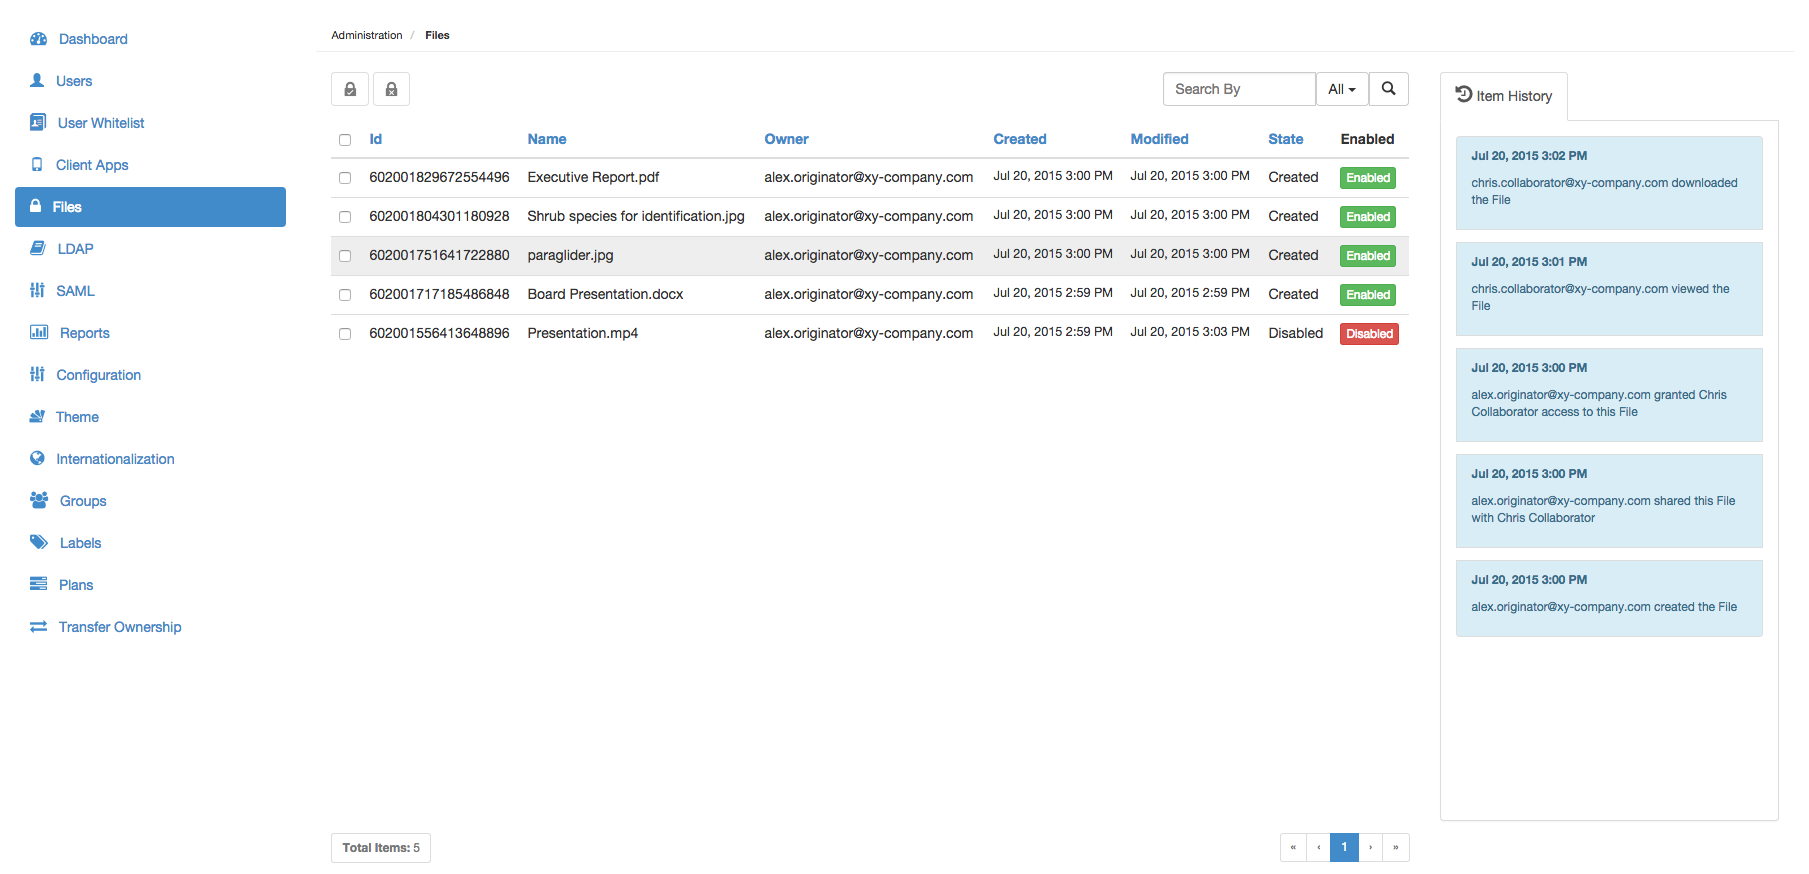
Viewing activities on Secure Objects
To view all activities performed on a Secure Object:
Find the Secure Object whose activities you wish to view.
Ensure the History panel on the right is displayed, by clicking the 'Show/hide right panel toggle' icon
(in the top bar). Note: This icon is only visible on the Files page of Covata Administration.
Highlight the item by clicking on it, which reveals (in the panel) a history of all recorded activities performed on the Secure Object in reverse chronological order. The activities recorded include those from:
The Secure Object's owner,
All collaborators on the Secure Object and
All Covata Platform administrators on the Secure Object (which currently only includes disabling and enabling the Secure Object).
Note: For more information about the activities recorded on a Secure Object (i.e. a file) from its owner or collaborators, see Types of activities in the Safe Share User's Guide.
Disabling or re-enabling Secure Objects
Disabling Secure Objects prevents access to any aspect of them (including access by their owners). Once a Secure Object is disabled:
Its corresponding file will no longer be visible or accessible to its owner and collaborators (upon them signing in) through Covata's Safe Share applications.
It can no longer be retrieved through a client application using the Covata Platform's API.
Notes:
Disabling deleted Secure Objects has no practical effect, since a deleted Secure Object can no longer be accessed or retrieved through a Covata Safe Share application or a client application using the Covata Platform's API.
Disabling Secure Objects that have only been initialized through a client application using the Covata Platform's API (resulting in an 'incomplete' Secure Object), prevents this Secure Object from being 'completed' through such an application. To allow these types of Secure Objects to be completed, a Covata Platform administrator must first re-enable these Secure Objects through Covata Administration.
To disable, enable or re-enable Secure Objects on the Covata Platform:
Find the Secure Object/s to be disabled, enabled or re-enabled.
For a single Secure Object, to:
Disable it - click the Secure Object's green Enabled button (in the State column), until this button changes red and indicates Disabled.
Enable or re-enable it - click Secure Object's red Disabled button (in the State column) until the button changes green and indicates Enabled.
For multiple Secure Objects:
Select their check boxes on the left (or select the top check box in the Secure Object list's header to select all check boxes of the currently visible Secure Objects).
Then, to:
Disable these Secure Objects - click the
(Disable Secure Objects) button at the top of the page and then Yes on the confirmation message box to continue.
The Secure Objects are disabled and their green Enabled buttons (in the State column) change to red Disabled ones.
Enable these Secure Objects - click the
(Enable Secure Objects) button at the top of the page and then Yes on the confirmation message box to continue.
The Secure Objects are enabled/re-enabled and their red Disabled buttons (in the State column) change to green Enabled ones.
Notes:
If any selected Secure Objects were already disabled or enabled upon clicking the Disable or Enable buttons (at the top of the page), respectively, then this action is ignored on these Secure Objects.
It is not possible to both disable and enable/re-enable different sets of Secure Objects in a single action.