You can manage the following aspects of your Covata user account through the My Account feature of Safe Share:
- Edit your Account Details such as your first, last and other names, as well as your mobile number and default language settings.
- Modify your Security settings, such as your Password and Two-factor authentication settings, as well as Terminate all of your currently active (i.e. signed in) sessions with the Covata Platform.
- View information about your last sign-in to the Covata Platform.
- View information about your storage usage and quota for each organization you are a member of.
- Modify your Email Notification Frequency.
- Revoke passcodes set on registered devices. Currently, passcodes (used to rapidly authenticate a Covata user to the Covata Platform) are only supported on iOS and Android devices running their native Safe Share applications.
- Revoke the right that non-Safe Share-based Client Applications were initially granted by you to access the Covata Platform's resources through your Covata user account.
You can also manage a list of contacts (relating to your account) of people you have either added yourself or shared items with previously. Your contacts list makes it easier to share items with a regular set of people.
To access the 'My Account' feature:
- Ensure you are signed in to Safe Share for Web.
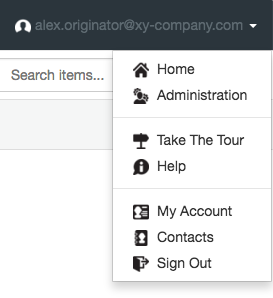
- Click your email address at the top-right of the page and choose My Account from the drop-down menu:
Updating your account details
To update your personal details:
- Access the My Account feature.
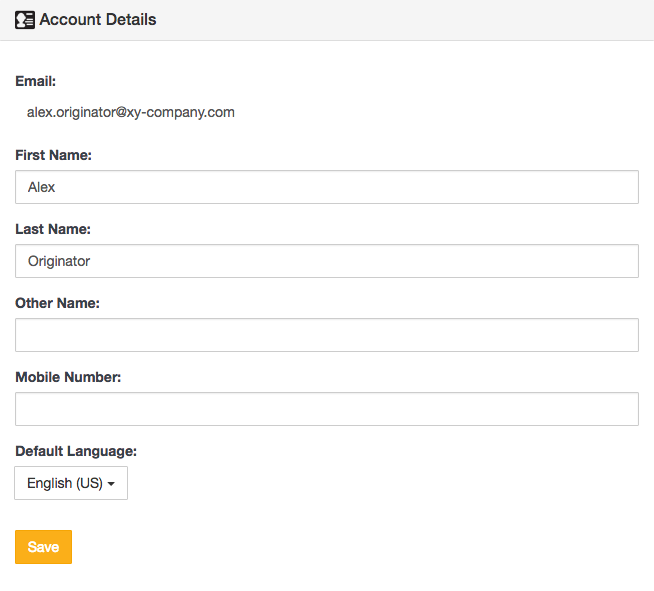
- In the Account Details section of the subsequent page (which you can jump to on this page by clicking the Account Details option on the left), update any of the following fields as required:
-
First Name - e.g. your given name or nickname
-
Last Name - e.g. your surname or family name
-
Other Name - e.g. a middle or other given name
-
Mobile Number - this must include the country calling code and plus (+) sign prefix
-
Default Language - select the appropriate language that suits your region/locale, which can also be changed from the Safe Share Sign-in page
Note: Updating the First Name, Last Name and Mobile Number also updates these fields in Safe Share Organization Administration, which can be accessed by Organization administrators. (Refer to the Organization Administrator's Guide for more information administering organizations on the Covata Platform.)
- Click the Save button and the updates to your personal details are saved.
Note: If your Covata user account was created from an external user directory (i.e. you have an LDAP account type), then you will not be able to change your password through Safe Share. To change these details, please contact your Covata Platform's Safe Share administrator or the administrator responsible for managing LDAP/the user directory for your account.
Changing your password
To change your password:
- Access the My Account feature.
- Scroll down to the Security section of the subsequent page (or click the Security option on the left to jump to this section) and then click the Change password button.
- Specify your old password and then your new password twice (once again to confirm it):
- Click the Change button and your Covata user account's password is now changed.
Note: If your Covata user account was created from a user directory which is external to the Covata Platform (i.e. you have an LDAP account type), then you will not be able to change your password through Safe Share. To change your password, please contact your Covata Platform's Safe Share administrator or the administrator responsible for managing LDAP or the user directory of your account.
Enabling or disabling 2FA on your account
You can improve the security of your Covata user account by configuring it with two-factor authentication (2FA).
If 2FA is enabled on your Covata user account, you are then required to enter both your password (i.e. the 1st authentication factor), as well as an authentication code obtained from an authenticator application (aka authenticator app) running on your mobile device (i.e. the 2nd authentication factor), in order to successfully sign in to Safe Share through this account.
Safe Share supports the following mobile devices and authenticator apps:
- Android-based devices running the Google Authenticator app,
- Apple's iPhone, iPad or iPod Touch devices running the Google Authenticator app, or
- Microsoft Windows-based devices running Microsoft's authenticator app.
Notes:
- Before enabling 2FA on your Covata user account, ensure you are in possession of one of these supported mobile devices. Otherwise, you risk preventing yourself from being able to sign in to Safe Share.
- It is possible that (at least) one of your Safe Share Organization administrators has enforced 2FA on all Covata user accounts who are members of their organization/s, which includes your user account. If this is the case, 2FA will be enabled and you will not be able to disable this feature.
To enable or disable 2FA on your account:
- Access the My Account feature.
- Scroll down to the Security section of the subsequent page (or click the Security option on the left to jump to this section).
- To enabled 2FA on your account:
- In the Security section, click the Enable button (to the right of 'Two-factor authentication ( disabled )').
Your user account's email address is sent a notification informing you that 2FA has been enabled on your account, along with a time-limited link, with step-by-step instructions for configuring 2FA.
- To disable 2FA on your account:
- In the Security section, click the Disable button (to the right of 'Two-factor authentication ( enabled )').
Your user account's email address is sent a notification informing you that 2FA has been disabled on your account.
Terminating your user account's sessions
Terminating your Covata user account's sessions immediately invalidates all of your currently valid refresh tokens. This action immediately signs you out of your current Safe Share for Web session and then every other Safe Share application with which you have an active session (i.e. once these sessions' access tokens expire). This also includes any other client applications using the Covata Platform's resources with access tokens obtained through your account.
This feature is useful if your user account is at risk of being compromised - for example, you suspect that you forgot to sign out from a shared computer or you were signed in from a laptop that was either lost or stolen before you signed out.
To terminate your Covata user account's sessions:
- Access the My Account feature.
- Scroll down to the Security section of the subsequent page (or click the Security option on the left to jump to this section) and then click the Terminate button.
Your current Safe Share for Web session with the Covata Platform is terminated immediately, which also results in you being signed out from your current session. You will need to sign in again to gain access to Safe Share, as well as your Covata Platform's resources.
Note: Every other Safe Share application with which you have an active session (including any other client applications using the Covata Platform's resources with access tokens obtained through your account), will be terminated once these sessions' access tokens expire.
Viewing your last sign-in details
To view information about your 'Last Sign-in Details':
- Access the My Account feature and ...
Scroll down to the Last Sign-in Details section of the subsequent page (or click the Sign In Details option on the left to jump to this section) to access the following information about your user account's last sign-in to Covata Safe Share or the Covata Platform:
- Client Application - the Client ID value of the client application through which your account was used to sign in to Covata Safe Share or the Covata Platform. In most cases, this would be the Client ID for Safe Share for Web, including Safe Share for Windows, OS X, iOS and Android applications. For more information about Client IDs, please refer to the Client ID description in the Safe Share Administrator's Guide,
- IP Address - the IP address of the computer/device from which this sign-in occurred and
- Time - when your account was used to sign in.
Viewing your storage usages and quotas
Information about your storage usage/s and quota/s (managed by the Covata Platform) is available in the Organizations section of the My Account feature, where each organization you are a member of has its own storage usage and quota.
To view information about your storage usage/s and quota/s:
- Access the My Account feature and ...
Scroll down to the Organizations section of the subsequent page (or click the Organizations option on the left to jump to this section) to access the following information about your Covata user account's storage usage/s and quota/s:
-
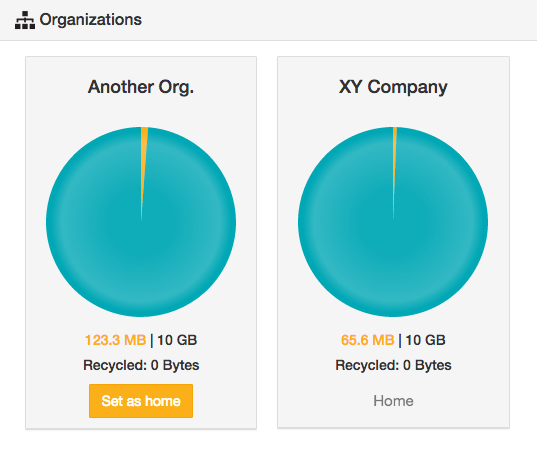
Organization name/s - Within the Organizations section, schematics of your user account's storage usage and quota (for each organization you are a member of) are presented in separate panels (one for each organization). The organization's name is indicated in bold text at the top of its panel.
-
Percentage usage/s - Each organization panel contains a pie chart, which represents the percentages of your account's quota (for that organization) that:
-
your data currently occupies (indicated by the word Used upon hovering your mouse over this segment of the pie chart) and
-
remains free (indicated by the word Available upon mouse-over).
Notes:
-
An Organization administrator from each of your organizations would have assigned a plan to your account when (and if) they granted your account the Originator role within their organization. (A plan provides your user account with a quota of storage space for an organization.) Refer to An organization user's fields in the Organization Administrator's Guide for more information.
-
A pie chart indicates No plan assigned if your user account does not have the Originator role for that organization. (The Originator role granted to your user account within an organization provides your account with the ability to securely upload and store content to your own storage space for that organization.)
Tip: If your Used percentage approaches 100% for any organization, then either remove some of your own secure content from that organization or ask your relevant Organization administrator to switch your plan to one with a larger quota.
-
Storage usage/s - Each organization panel indicates the number of megabytes of storage that your account currently uses (within its respective organization). This information is not shown if your user account does not have the Originator role.
-
Quota/s - Each organization panel also indicates the amount of your account's quota (in gigabytes) for its respective organization. Again, this information is not shown if your user account does not have the Originator role.
-
Recycled - For each organization, indicates the amount of storage space consumed by items currently located in the Recycled Bin (for your Covata user account).
Your current home/default organization (see Changing organizations for more information about this feature) is indicated by the word 'Home' near the base of its organization panel. To change your home/default organization to that of another, click the Set as home button within the relevant organization's panel.
Modifying your email notification preferences
You can reduce the frequency of your Covata notifications by modifying your email notification preferences from the default of one email for every file or folder that is shared with you, to a periodic digest of all files and folders that have been shared with you over a set period.
To modify your email notification preferences:
- Access the My Account feature.
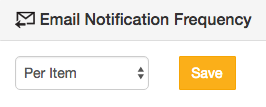
- Scroll down to the Email Notification Frequency section of the subsequent page (or click the Email Notifications option on the left to jump to this section) and choose:
-
Per Item to receive an email notification for every file or folder that is shared with you.
Note: Your Covata Platform instance has a system-wide property entitled 'Item shared notification frequency in minutes', whose default value is 15 and can be configured by a Safe Share administrator through Safe Share administration. If you are shared multiple items within this time interval, you only receive a single email digest of all files and folders that have been shared with you during that period.
-
Daily to receive a daily email notification of all files and folders that were shared with you over the last day.
-
Weekly to receive a weekly email notification of all files and folders that were shared with you over the last week.
-
None to not receive any email notifications when a file or folder is shared with you.
- Click the Save button and the updates to your email notification preferences are saved.
Revoking passcodes on registered devices
The Registered Devices section towards the end of this page (accessed through the My Account feature and then by clicking the Registered Devices option on the left), only indicates something other than 'No registered devices' if you have:
- used a Safe Share for iOS or Android application and
- have set a passcode through at least one of these devices.
This feature:
- displays the names of devices on which you have registered passcodes (through your Covata user account), which are used to rapidly authenticate your account to the Covata Platform through the native Safe Share or iOS/Android applications and more importantly,
- can be used to revoke passcodes set on specific devices. From a data security perspective, the ability to revoke a passcode set on a specific device is useful if such a device is misplaced, lost or stolen (since entering a passcode bypasses the requirement for a Covata user to enter their email address and password, and perform the two-factor authentication (2FA) step, to authenticate to the Covata Platform).
To revoke the passcode set for a specific device, identify the device's name in the list (under Device Name) and click its Remove button to the right of the page.
Revoking client applications
The Applications section at the end of this page (accessed through the My Account feature and then by clicking the Applications option on the left) indicates 'No applications found' if you have not used a client application that:
- integrates with the Covata Platform's Application Programming Interface (API) and
- is not a Covata Safe Share application.
Managing your contacts
Whenever you share content with other people, their email addresses are automatically added to your list of Contacts. This list makes it easier to specify these people as collaborators in the 'Share' dialog box (using autocompletion) the next time you share your content with them.
You can also manually add, edit or delete any of these personal contacts through the Contacts feature.
Note: Like the address book feature, which autocompletes the email addresses of any members of your current organization in the Share dialog box and is enabled by an Organization administrator of your current organization, your list of Contacts also autcompletes the email addresses of people you have added to this list. However, your Contacts are available for use in all organizations you are a member of. For more information about these features in the Share dialog box, see Notes about the 'Share' dialog box after the image of this step 5 of the Sharing secure content procedure.
To access the 'Contacts' feature:
- Ensure you are signed in to Safe Share for Web.
- Click your email address at the top-right of the page and choose Contacts from the drop-down menu:
To manually add a new 'Contact':
- Access the Contacts feature.
- Click the top-left New Contact button.
- In the Contacts dialog box, specify an optional First name and Last name and mandatory Email address fields.
- Click Save to add your new Contact.
To edit an existing 'Contact':
- Access the Contacts feature.
- Click either the Edit or email address link associated with the Contact to be edited.
- In the Contacts dialog box, edit the optional First name and Last name and mandatory Email address fields as required.
- Click Save to update your existing Contact.
To delete an existing 'Contact':
- Access the Contacts feature.
- Click the Delete link associated with the Contact to be deleted.
The contact's email address will no longer be available for selection when sharing your content.