The Groups page allows Covata Platform administrators to define groups of Covata users with whom files (or Secure Objects) can be shared.
Permission to share a file/Secure Object with a group of users is granted through the group's association with a label (specified when sharing this file/Secure Object).
Belongs to any group, which in turn is associated with a label, then that Covata user can be shared a file/Secure Object when this label is specified.
Is not associated with a label (by virtue of their account not being a member of any group associated with this label), then that Covata user cannot be shared a file/Secure Object when this label is specified.
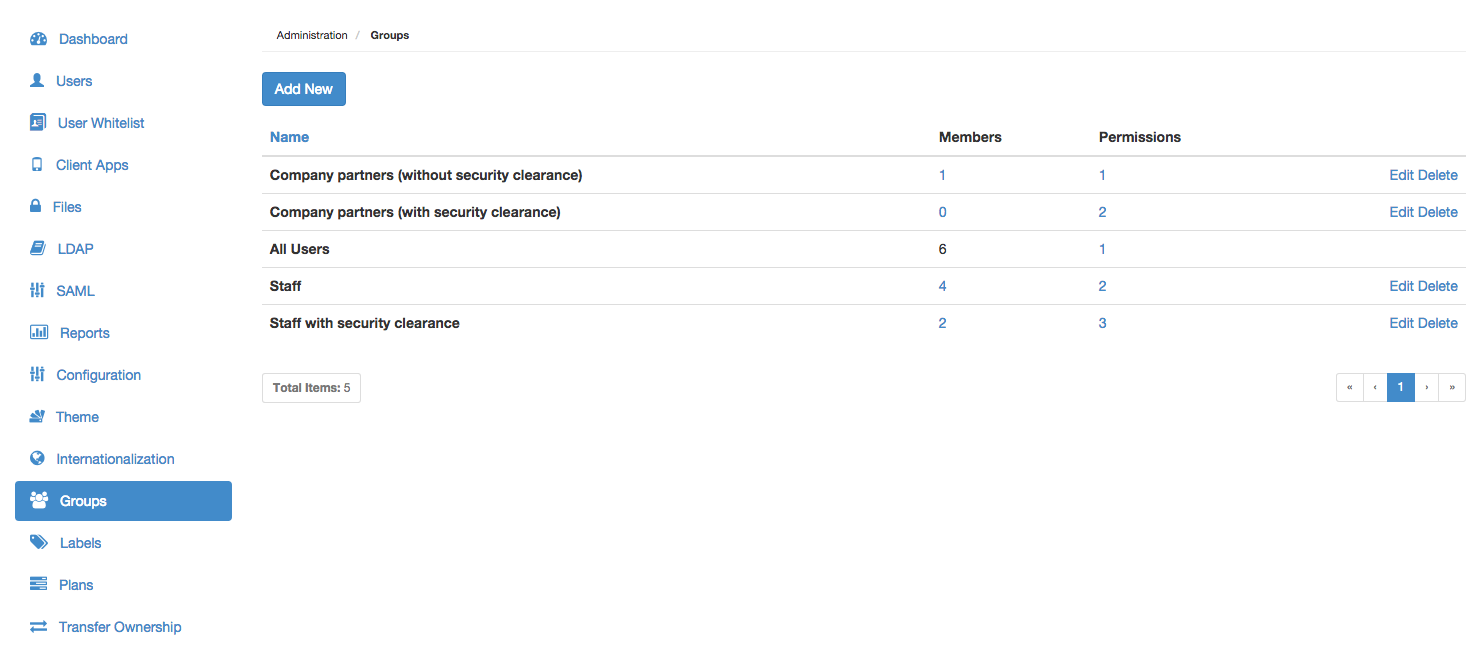
Click the Groups option on the left of the Covata Administration interface to open the Groups page. Note: If adding the first group, an existing All Users group will be present. This 'reserved' group contains all Covata users on your Covata Platform instance and cannot be deleted. However, labels can be modified on this group.
Click the Add New button.
In the Add new group dialog box, specify the:
Name - A name that best describes its members (i.e. Covata users) in a short sentence.
Description ( Optional ) - A longer description to provide more information about the group. Be aware that the value of this field is only visible when this group is subsequently edited (in the Edit group dialog box).
Click Save and the new group is added and will appear as a new entry on the Groups page. Notes:
To associate this group with one or more labels, which would then allow these labels to restrict file sharing to any Covata users who are members of this group, see Modifying labels on an existing group.
Modifying users on an existing group
To modify the membership of Covata users with an existing group:
In the Members column, click the numbered link associated with the group whose existing Covata users are to be modified. This opens the 'group's members' dialog box. Note: It is not possible to modify the members of the All Users group, since this 'reserved' group includes all Covata users on your Covata Platform instance.
In this dialog box, any Covata users whose email addresses appear in the Group members section on the right are already members of the group:
To do the following:
Do this:
Which results in this:
Add a user to the group
Click the email address of that user in the Available users section.
Transfers that user to the Group members section.
Remove a user from the group
Click the email address of that user in the Group members section.
Transfers that user to the Available users section.
Find specific users by filtering them (making it easier to add or remove them above)
In either the Available users or Group members sections, begin typing (into its respective Filter... box) a series of characters contained in the Covata users' email addresses.
The list of users (in their respective section/s) being filtered to those whose email address contains the subset of characters entered into its Filter... box.
Add all users to the group
Click the
(Add all) button in the Available users section.
Transfers all remaining users in this section to Group members.
Remove all users from the group
Click the
(Remove all) button in the Group members section.
Transfers all remaining users in this section to Available users.
Click Save and the group's membership will be modified accordingly. The number in the Members column associated with this group is updated to reflect the total number of Covata users that were in Group members section (just before clicking Save). Note: To associate this group (of one or more Covata users) with one or more labels (which would then allow these labels to restrict file sharing to these Covata users), see Modifying labels on an existing group.
Modifying labels on an existing group
To modify the association of labels with an existing group:
In the Permissions column, click the numbered link associated with the group whose existing labels are to be modified. This opens the 'group's labels' dialog box.
In this dialog box, any labels which appear in the Group labels section on the right are already associated with the group:
To do the following:
Do this:
Which results in this:
Add a label to the group
Click the label in the Available labels section.
Transfers that label to the Group labels section.
Remove a label from the group
Click the label in the Group labels section.
Transfers that label to the Available labels section.
Find specific labels by filtering them (making it easier to add or remove them above)
In either the Available labels or Group labels sections, begin typing (into its respective Filter... box) a series of characters contained in the label's name.
The list of labels (in their respective section/s) being filtered to those whose name contains the subset of characters entered into its Filter... box.
Add all labels to the group
Click the
(Add all) button in the Available labels section.
Transfers all remaining labels in this section to Group labels.
Remove all labels from the group
Click the
(Remove all) button in the Group labels section.
Transfers all remaining labels in this section to Available labels.
Click Save and the group's labels will be modified accordingly. The number in the Permissions column associated with this group is updated to reflect the total number of labels that were in Group labels section (just before clicking Save). Note: To add one or more Covata users to this group, which would then allow these labels to restrict file sharing to these Covata users (including any others who are members of this group), see Modifying users on an existing group.
Editing an existing group
Editing an existing group allows modification of the group's Name and Description. This functionality can also be used to view a group's Description.
Locate/scroll to the relevant group and click its Edit link.
In the Edit group dialog box, modify the:
Name - A name that best describes its members (i.e. Covata users) in a short sentence.
Description ( Optional ) - A longer description to provide more information about the group. Be aware that this field is only visible from this dialog box.
Click Save and the group's Name and Description are updated accordingly.
Therefore, if a Covata user was shared a file/Secure Object with a label that is associated with one or more groups (of which the user is also a member) and the deletion of one of these groups results in the user:
Still remaining associated with this label (through the label's association with other groups to which the user is also a member), then the user will still have access to this file/Secure Object.
Losing their association with this label (because the user was not a member of any other group that had an association with this label), then the user loses access to this file/Secure Object.