To sign in to SafeShare for Web:
- Access the SafeShare Sign-in page by doing either of the following:
- Open a compatible web browser and specify the base URL of your SafeShare for Web instance (which is also the Cocoon Data Platform URL) into your browser's URL field - e.g:
https://safe-share.xy-company.com
Tip: You may wish to bookmark this URL.
Note: If a SafeShare administrator has configured your Cocoon Data Platform instance (and hence, SafeShare for Web) with single sign-on, such that authentication can be handled through a separate Identity Provider (IdP), refer to the Signing in using single sign-on procedure below instead.
- Open one of your Cocoon Data Notification email messages (such as a message containing one the following subject lines) and in the message's body, click the Click here link or 'click this link' URL to open the Sign-in page:
- 'New items have been shared with you'
- 'Cocoon Data account created'
- 'Account Updated Notification'
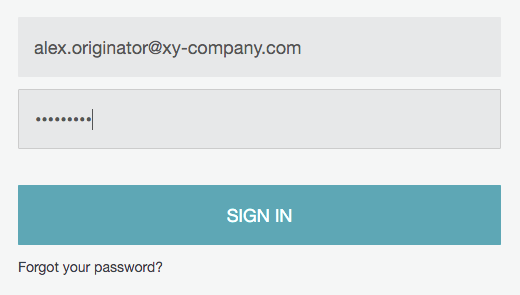
- On the SafeShare Sign-in page, enter your Email address and Password into the relevant fields:
Notes:
- If you have forgotten your password, then again, leave the Password field blank but click the Forgot your password? link instead. Follow the instructions on the page and then in your email notification to reset your password.
- If you would like to change your current language (for your region/locale), you can choose the appropriate language (for all languages currently configured on your Cocoon Data Platform instance) at the top-left of the SafeShare Sign-in page. Doing so changes your default language settings available through the My Account feature.
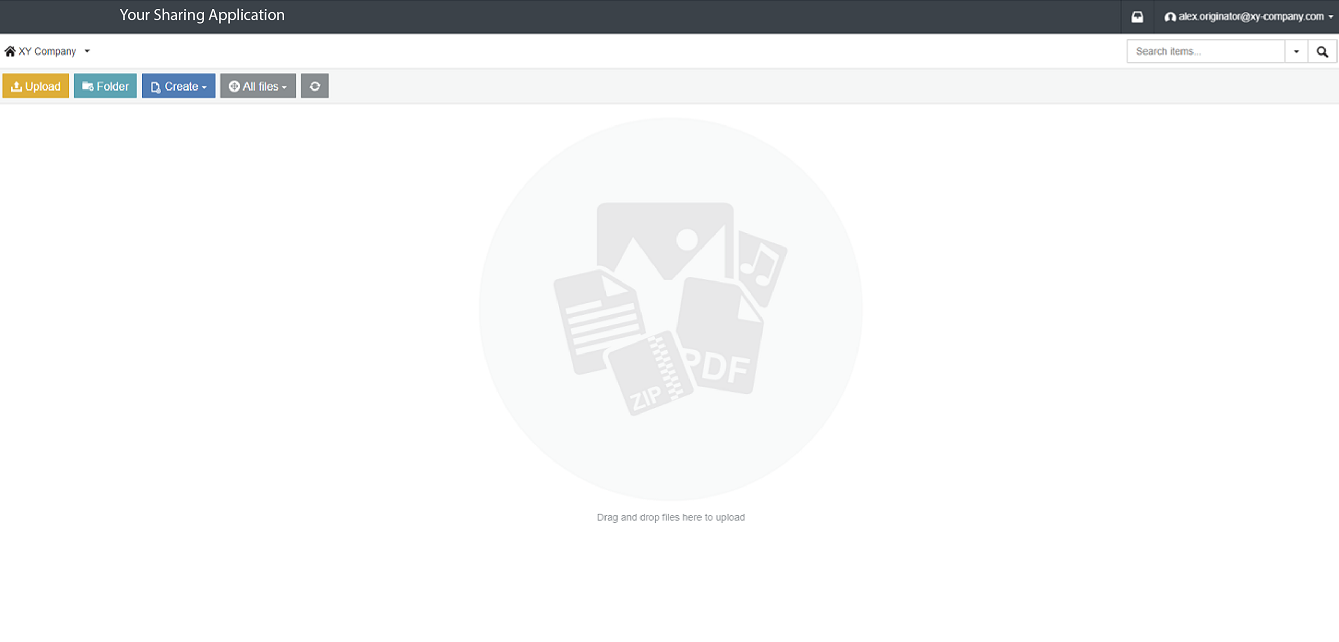
- Click the SIGN IN button (or type 'enter'/'return') and the main SafeShare page is displayed:

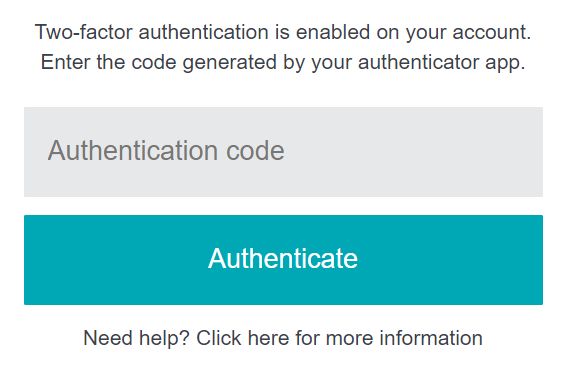
Otherwise, if instead you see 'Two-factor authentication is enabled on your account...' on the page (see below) and a request to enter your Authentication code, then either you have configured your Cocoon Data user account with two-factor authentication (2FA) (through the 'My Account' feature) or at least one of your SafeShare Organisation administrators has enforced this feature on your account.
If you see the following page for the first time or you need to (re-)configure a mobile device with your Cocoon Data user account for 2FA, refer to the Configuring a mobile device for two-factor authentication procedure below before continuing on.
-
To complete the authentication process:
-
Open the authenticator app on your mobile device.
-
In the Authentication code field, enter the code from the authenticator app that relates to your Cocoon Data user account.
-
Click the Authenticate button to complete the authentication process and the main SafeShare page is displayed.
Note: If you successfully authenticated after accessing the SafeShare Sign-in page from a:
- 'file has been shared with you' email notification, you are taken directly to the file's content viewer instead of the main SafeShare page (above).
- 'Cocoon Data account created' email notification, you may be required to reset your password first before the main SafeShare page is displayed.
Tips:
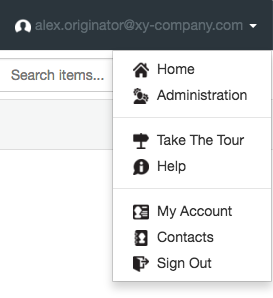
- If you navigate to another page within SafeShare for Web, you can easily navigate back to the root location of the main SafeShare page by clicking your email address at the top-right and choosing Home from the drop-down menu:
See Organizing content with folders for more information about creating folders.
Note: The Administration option is only present if your organisation's SafeShare Organisation administrators has granted your user account the Organisation administrator role (or in rare circumstances, one of your Cocoon Data Platform's SafeShare administrators has granted your account the SafeShare administrator role). For more information about the Organisation administrator role, please refer to the Organisation Administrator's Guide (and for the SafeShare administrator role, the SafeShare Administrator's Guide).
- If changes have been made by another Cocoon Data user to any items you can access from the main SafeShare page (e.g. because this other Cocoon Data user shared content with you), then a number appears on the refresh button near the top-left of the page
. This number indicates how many of your accessible items have changed and accounts for all of your accessible items located in the root location, your current folder, as well as all other subfolders you can access from the main SafeShare page. Click this button to refresh all your accessible items in all of these locations and folders.
Configuring a mobile device for two-factor authentication
If either you or one of your Organisation administrators has configured your Cocoon Data user account with two-factor authentication (2FA), then you require a mobile device (i.e. an Android-, iPhone-, iPad-, iPod Touch- or Microsoft Windows-based one) running an authenticator application (from Google or Microsoft) to be able to sign in to SafeShare for Web.
This authenticator application (aka authenticator app) that runs on your mobile device provides the 2nd authentication factor for your account, where your password is the 1st authentication factor.
To configure your mobile device with your Cocoon Data user account for 2FA:
- Check for a Cocoon Data Notification email message containing the subject line 'Two-factor authentication has been enabled for your account'.
- Open this email message and follow its instructions - i.e. click the link to open the 2FA configuration pages.
Follow the remaining instructions on these 2FA configuration pages to complete the process for configuring your mobile device and then continue with entering your authentication code to complete the authentication process and sign in to SafeShare for Web.
Signing in using single sign-on
If a SafeShare administrator has configured the Cocoon Data Platform and SafeShare for Web with single sign-on, such that authentication is handled through a separate Identity Provider (IdP), you can begin the process of signing in to SafeShare by doing the following:
- Specify the base URL of your SafeShare for Web instance (appended by
/sso) into your browser's URL field - e.g:
https://safe-share.xy-company.com/sso
- Click the Single Sign-on button.
- Sign/log in through your IdP service's page by entering your credentials into this page. You should then be directed back to SafeShare for Web (in a signed in state), with the main SafeShare page being displayed:

See the Tips section above for more information about navigating SafeShare for Web.
Note: If the two-factor authentication (2FA) page (above) is displayed before the main SafeShare page is shown, you may wish to disable the 2FA feature on your Cocoon Data user account, since your IdP service may provide its own 2FA or other multi-factor authentication features. If you cannot disable 2FA for your account, contact an Organisation administrator from each organisation you are a member of to determine if one of these administrators has made 2FA mandatory for all user accounts which are members of their organisation. For more information about this SafeShare Organisation Administration feature, see Configuring SafeShare Organisation Administration properties in the Organisation Administrator's Guide.
Signing out
To sign out of SafeShare for Web:
- Click your email address at the top-right of the page and choose Sign Out from the drop-down menu:
Notes:
- If you do not yet have a password, you will only see the Set Password and Sign Out options in the drop-down menu (above). You can upgrade to a full account (to gain access to more of the features above) by choosing Set Password and following the instructions provided.
- Be aware that if you signed in to SafeShare for Web using single sign-on, then accessing SafeShare for Web's single sign-on URL - e.g:
https://safe-share.xy-company.com/sso
in your browser and clicking the Single Sign-on button will automatically sign you back in to SafeShare for Web (without you needing to enter your credentials into the IdP service's page). This is intentional behavior because your IdP service handles the signing/logging out process. If you are uncertain about how to sign out from your IdP service, consult a SafeShare administrator of your Cocoon Data Platform instance or the system administrator who administers your IdP service for more information about this process.


