Uploading and storing personally owned content
This procedure explains how to begin uploading and storing your own content managed by the Cocoon Data Platform.
Note: This feature is only supported when using SafeShare for Web on a desktop/laptop computer. Uploading is not supported through web browsers on tablets, phones or other similar devices. If you use an iOS- or Android-based device, however, please note that Cocoon Data also releases dedicated apps for these platforms (SafeShare for iOS and SafeShare for Android respectively), which support secure uploading and storage of data.
To upload and store personally owned content securely:
- Ensure you are signed in to SafeShare for Web.
- If the Home icon at the top-left (followed by the name of your current organisation) has no drop-down icon is indicated, then you are a member of only one organisation. Therefore, you can skip to the next step.
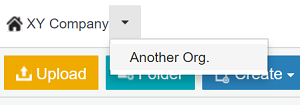
Otherwise, if a drop-down icon is indicated to the right on the right of your current organisation's name, then your Cocoon Data user account is a member of multiple organisations on your Cocoon Data Platform instance. If you have just signed in, your 'home' (i.e. default) organisation is indicated and selected. To select a different organisation (you are a member of) in which to upload and store your content, choose the appropriate organisation via the drop-down icon. For example:
Tip: Your home/default organisation can be changed through your Cocoon Data user account management features.
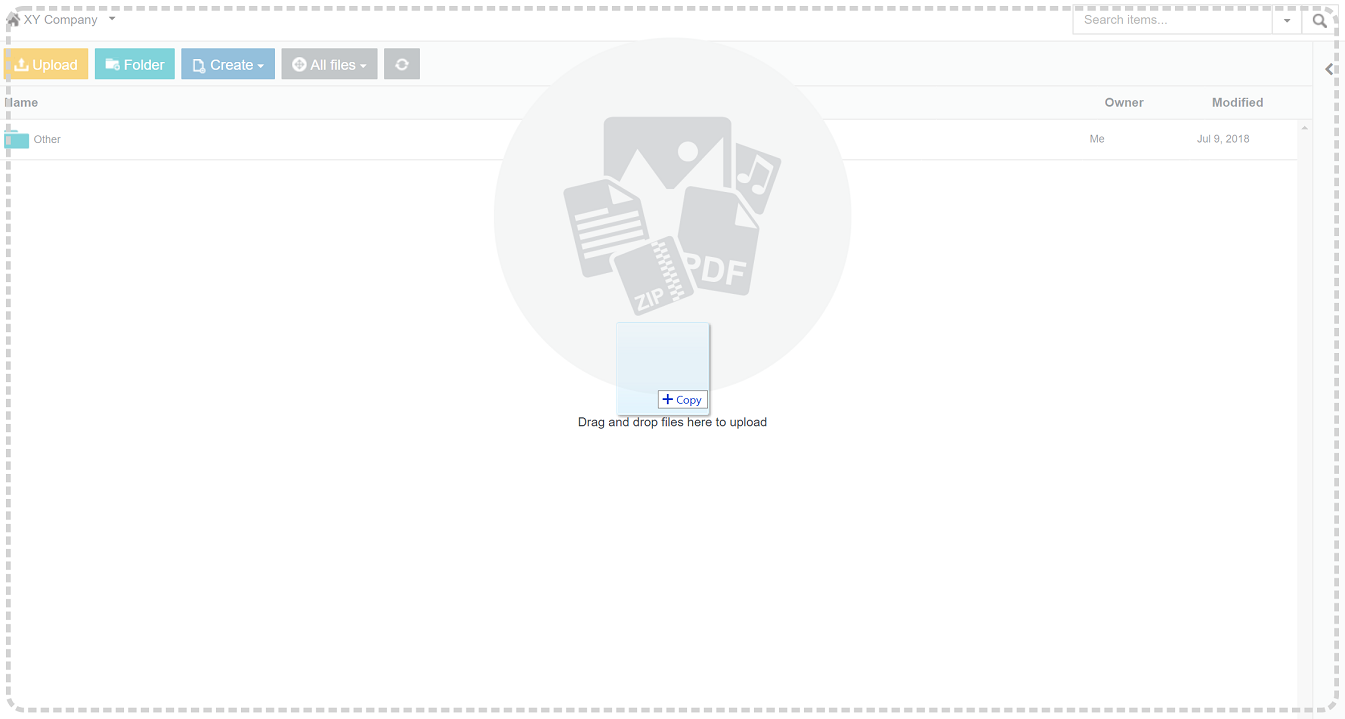
- Select one or more file/s on your desktop/laptop computer and drag and drop them onto the items area of the main SafeShare page:
Tips:
-
Whenever you drag one or more file/s over the items area of the main SafeShare page, a graphic with the accompanying 'Drag and drop files here to upload' message appears over this area (if not already shown), indicating that SafeShare for Web is ready to upload your file/s.
-
You can also upload one or more file/s by clicking the Upload** button (left-side of the toolbar near the top of the page) and then selecting the file/s from your computer.
-
It is also possible to upload one or more file/s to an existing folder by dragging and dropping the file/s on that folder in the items area. The folder highlights a different color to indicate that the files will be uploaded to that folder. See Organizing content with folders for more information.
-
If you attempt to upload a file whose name matches that of an existing file at a given location, you may be prompted with the File Already Exists message box, which requests whether or not to upload a new version of that file. Clicking Yes proceeds with uploading the new file version. See Managing file versions for more information.
Note: If you choose the Always upload a new version check box on the File Already Exists message box before clicking Yes, then dragging and dropping a new file whose name matches that of an existing one will always directly upload a new version (i.e. bypassing this message box).
-
To ensure you are only working with your own items listed in the items area, first click the All files drop-down at the top-left of the main SafeShare page and choose the My files filter before proceeding to upload files.
Notes:
-
If you cannot upload files, then either:
-
Your account may not have the Originator role for your organisation. To resolve this issue, either:
-
Ask (one of) your organisation's SafeShare Organisation administrator/s to grant your user account this role.
-
Alternatively, if you are a member of another organisation in which you have the Originator role, choose that organisation instead.
-
You may not have permission to upload to the current location in the file area. See the Tips in Organizing content with folders for details.
-
The maximum file size which can be uploaded depends on properties configured on the Cocoon Data Platform. This size can be provided by one of your Cocoon Data Platform's SafeShare administrators.
- The 'Uploads in progress' icon
(in the top header bar) indicates the number of files currently being uploaded to storage managed by the Cocoon Data Platform. Be aware that files are encrypted before they are actually stored.
-
While files are being uploaded, you can view and/or cancel any files whose uploads are still in progress as follows:
-
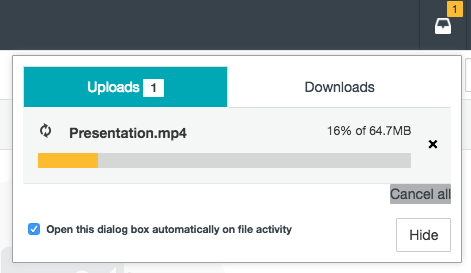
If required, click the 'Uploads in progress' icon to view the files currently being uploaded:
-
In the pop-up, click the x icon next to the files whose uploads you wish to cancel (or Cancel all to cancel all file uploads mentioned in this pop-up).
Tip: To close this pop-up, click its Hide button or somewhere outside the pop-up.
Note: This 'view uploads/downloads and/or cancel' feature works best with large file sizes. If your files are small, you may not have sufficient time to use this feature.
Once the upload process is complete, your content is securely stored by SafeShare (in its specified location within your organisation).
Tips and notes:
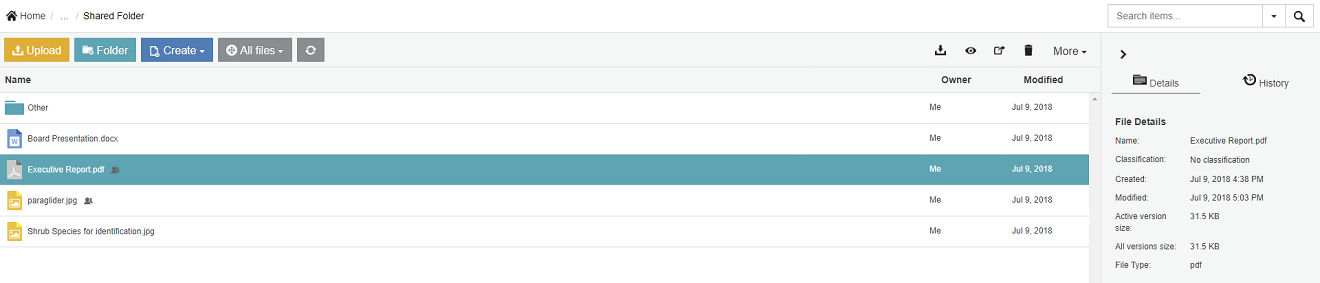
- Whenever an item is selected, then by default, its Details and History tabs appear to the right of the items area:
- If you uploaded the selected item and shared it with one or more other people, then a Sharing and Permissions section appears (under the File/Folder Details section of the Details tab), showing the Cocoon Data users that you have currently shared the item with.
- If another user created the selected item, then an Owner Details section appears (under the File/Folder Details section of the Details tab). If this owner granted you (as a collaborator on this item) the Create, Manage or Co-Owner permissions, which they can perform from the 'Share' dialog box (see Sharing secure content below for more information), then the Sharing and Permissions section also appears (under Owner Details), showing the users that the item has currently been shared with (along with the owner).
- The Details/History tabs panel can be collapsed and expanded by clicking the respective > / < icon at the top of this panel.
- Dragging folders into the file area of the main SafeShare page is not supported, since this action is not handled consistently between different browsers. For example:
- Some browsers (like Chrome) result in only the files contained within the dragged folder being uploaded to storage (managed by the Cocoon Data Platform) within the current location shown in the items area.
- Other browsers (like Firefox) result in the dragged folder and its contents failing to upload to storage.
Changing organisations
The top-left of the main SafeShare page indicates a Home/House icon, followed by the name of your current organisation (1) . If a drop-down icon is indicated to the right of your current organisation's name, then your Cocoon Data user account is a member of multiple organisations on your Cocoon Data Platform instance.
Your current organisation (indicated at the top-left) is the one associated with any content visible on the items area of the main SafeShare page, to which you can upload and store more content, share, as well as access and manage existing content.
If you have just signed in to SafeShare for Web, your 'home' (i.e. default) organisation is indicated and selected. To select a different organisation (you are a member of), choose the appropriate organisation via the adjacent drop-down icon. For example:
Tip: Your home/default organisation can be changed when viewing your account's storage usages and quotas through your Cocoon Data user account management features.
(1) If you navigate through to a deep subfolder from the root level (see Organizing content with folders for more information), then the name of your organisation may disappear - especially when the browser page's width is narrow/-ed. Therefore, to check your current organisation, either expand your browser's width or navigate to a subfolder closer to the root level.
Sharing secure content
This procedure explains how to begin sharing either:
- personally owned secure content (which you or someone else had previously uploaded) with other people, or
- secure content (owned by another Cocoon Data user) that has been shared with you with Co-Owner permissions,
as well as how to modify the people who can access this content (known as 'collaborators') and/or these collaborators' access permissions to this content.
Notes: Permissions are explained in detail within the following procedure (below).
To share securely stored content with other people (or modify any existing sharing on this content):
- Ensure you are signed in to SafeShare for Web.
- If the Home icon at the top-left (followed by your current organisation's name) has no drop-down icon indicated, then you are a member of only one organisation. Therefore, you can skip to the next step.
Otherwise, the name of your current organisation is indicated, from which you can either:
- skip to the next step to continue with sharing an item from this organisation, or
- share an item from a different organisation (you are a member of) by changing your organisation before continuing on.
- To share:
- Personally owned content, locate the file or folder (that you own) in your current organisation to either share with one or more other people or modify existing collaborators on.
Tip: To ensure you are only working with your own items in the items area, click the All files/filter drop-down (left-side of the toolbar near the top of the page) and ensure the My files filter is chosen.
- Content owned by another Cocoon Data user (i.e. as a collaborator on this content), locate this other user's file or folder in your current organisation to either share with more people or modify existing collaborators on.
Tip: To ensure you are only working with items that other users have shared with you as a collaborator, click the All files/filter drop-down in the toolbar near the top of the page and ensure the Shared with me filter is chosen.
- Open the item's Share dialog box by doing one of the following:
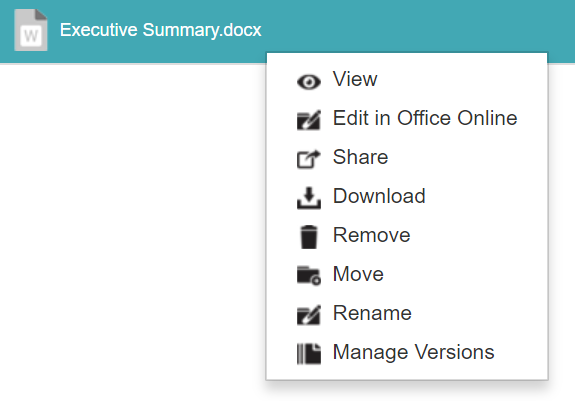
- Right-click on the item's row and choose Share from the pop-up menu:
Note: If this menu option is not available, then it is not possible to share the item since you are only a collaborator on this item and you were not granted Co-Owner permissions on it when this item (or one of its ancestral folders) was shared with you. (Your current permissions on a selected item is indicated by the Access field's value in the File/Folder Details section of the Details tab to the right of the items area.)
OR
- Either focus on the item, by hovering your mouse pointer over the item's row, or select the item, by clicking on the item's row (to the right of its name if a folder):
- If you:
-
Focussed on the item, click the 'Share' icon
in its row.
-
Selected the item, click the 'Share' icon
either in its row or the right-side of the toolbar near the top of the page.
Note that the Share icon will not be available if you are only a collaborator on this item and you were not granted Co-Owner permissions on it.
- In the Share dialog box, do one of the following:
-
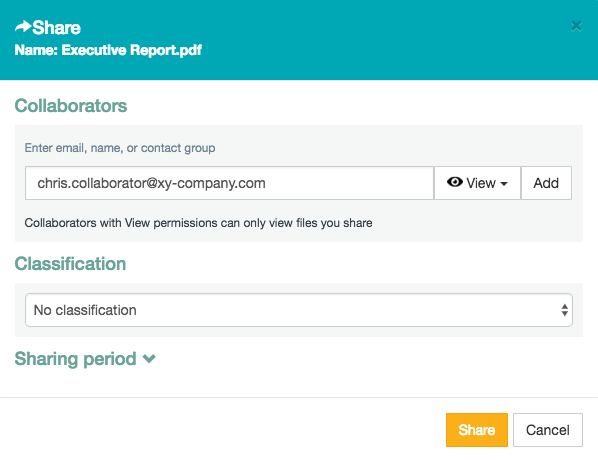
To share the item with someone or a contact group (known as a 'collaborator'), type the email address of this person or the name of the contact group into the text box and skip to the next step about selecting permissions for this collaborator. (Before doing so, read the Notes about ... immediately below the following image for important information about the Share dialog box's functionality. Also refer to Discovering your contact groups for more information about contact groups and determining their name.)
Notes about the 'Share' dialog box:
-
If the email address you are typing autocompletes in a drop-down list for selection before you have completed typing it out, then:
-
you have either:
-
already used that email address when previously sharing an item (which automatically added the address to your list of contacts - see Managing your contacts for more information)
-
manually added that email address to your list of contacts.
-
an Organisation administrator (of your current organisation) has enabled the address book feature, which autocompletes the email address of any member of your current organisation. For more information about this SafeShare Organisation Administration feature, see Configuring SafeShare Organisation Administration properties in the Organisation Administrator's Guide.
-
When specifying a contact group's name, you only need to specify three consecutive letters within the name of the contact group for it to autocomplete in a drop-down list for selection.
-
If you are sharing a folder, then a slightly different dialog box will be shown. (These differences are explained further down.)
-
If an Organisation administrator (of your current organisation) has not configured any classifications on their system, then the Classification section will be absent from the Share dialog box. For more information about classifications, refer to Managing classifications in the Organisation Administrator's Guide.
-
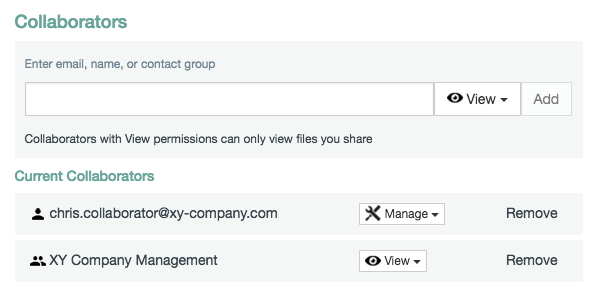
To modify the permissions of an existing collaborator on the item, locate the existing collaborator's email address (or contact group's name) in the Current Collaborators list (on this dialog box) and skip to the next step on selecting permissions for this collaborator.
-
To remove existing collaborators from the item, locate the existing collaborators email addresses (or contact groups' names) in the Current Collaborators list (on this dialog box) and click the Remove link associated with each email address/contact group name. If you need to add more collaborators to the item or modify existing collaborators' permissions, follow the appropriate action/option in this step (above). Otherwise, once you have completed removing collaborators from this item, skip to step 9 (below).
Tips:
-
If you only need to modify the permissions of existing collaborators on an item or remove existing collaborators from the item, you can do so quickly (without having to open the Share dialog box) by:
-
Selecting the item from the items area of the main SafeShare page.
-
In the Sharing and Permissions section of the Details tab to the right of the items area, locating the appropriate collaborators' email addresses/contact group names and from their respective Permission drop-downs, choosing the required permissions (or choosing Unshare to remove the collaborators from the item).
-
To share multiple items at a time, refer to the Additional tips at the end of this procedure.
-
The Share dialog box can also be accessed from the content viewer (providing that you own the content being viewed).
- Select one of the following permissions from the adjacent drop-down to define the extent of access that the collaborator has to this item:
| Permissions | Description |
| View | Grants the individual permission to view this file (from SafeShare's read-only content viewer) or if the item is a folder (2) , the same individual permission to view any files contained within this folder (and its subfolders) is also granted. See File formats supported by the content viewer for a list of file types that this content viewer supports. |
| Edit In Office Online | Grants the individual permission to view and edit the document using Office Online. The Edit in Office Online permission does not allow the Collaborator to Download, Create or Manage the file(s). However, if any of these higher permission levels are given, the user will also have the Edit in Office Online option. |
| Download | Grants the individual permissions to view, print (also from SafeShare's read-only content viewer) and download this file or if the item is a folder (2) , these same individual permissions to perform these actions on any files contained within this folder (and its subfolders) are also granted. |
| Create | Grants the individual permissions to view, print and download existing files, as well as upload new versions of files. If the item is a folder (2) :
-
these same individual permissions are also granted to any files and subfolders contained within this folder, and
-
the individual permissions to upload new files and their versions and create new subfolders (within this folder) are granted.
|
| Manage | Grants the individual permissions to view, print, download, rename and remove this file. If the item is a folder (2) :
-
these same individual permissions are also granted to any files and subfolders contained within this folder,
-
the individual rename and remove permissions are granted to this folder itself,
-
the individual permissions to upload new files and their versions, create new subfolders and remove existing subfolders (within this folder) are granted,
-
the individual permission to move either a file or a subfolder to another subfolder (all contained within this folder) are also granted, and
-
permission to access a file's other versions is also granted, from which any version can be viewed, printed, downloaded or set as Active.
|
| Co-Owner | Grants the individual permissions to view, print, download, rename, share and remove this file. If the item is a folder (2) :
-
these same individual permissions are also granted to any files and subfolders contained within this folder,
-
the individual rename, share and remove permissions are granted to this folder itself,
-
the individual permissions to upload new files and their versions, create new subfolders and remove existing subfolders (within this folder) are granted,
-
the individual permission to move either a file or a subfolder to another subfolder (all contained within this folder) are also granted, and
-
permission to access a file's other versions is also granted, from which any version can be viewed, printed, downloaded or set as Active.
Be aware that if your Cocoon Data user account is listed on the Share dialog box as a collaborator (with Co-Owner permissions) and you demote these permissions to something else, then upon clicking Share/Update at the end of this procedure, you will lose the ability to subsequently access this dialog box for this content. To regain this access, ask the owner of the content (or another collaborator on it with Co-Owner permissions) to change your permissions on this content to Co-Owner again. |
If you are not adding a new collaborator to the item, skip to step 8 (below).
(2) Note: When sharing a folder:
- The collaborators and their permissions (to access content within the folder) are implicitly propagated (i.e. applied) to all items contained within the folder.
- If collaborators and/or their permissions on a subfolder (within this folder) are modified, then these modifications are explicitly set on this subfolder, which in turn are implicitly propagated down through this subfolder's item hierarchy.
- The permissions of a collaborator set explicitly on this subfolder override any permissions which this collaborator may have inherited implicitly from an ancestral folder.
- If the collaborator's email address or contact group name does not appear in the Current Collaborators list on this dialog box, click the Add button (or if selecting the default View/Download permissions, simply type 'enter'/'return' after specifying the email address) and the collaborator's email address/contact group name + their selected permissions are added to the collaborator list:
Tip: You can also specify multiple collaborators in this text box to add continuously/'in one go' by doing either of the following:
-
Typing a separator/delimiter character (such as a comma and/or semicolon) after collaborator; upon typing the separator, the collaborator's email address or contact group name is automatically added to the list.
-
Copying and pasting a delimited 'string' of email addresses into this field (separated using these delimiter characters); SafeShare for Web automatically identifies each email address in the string and adds them to the list. (This does not work for contact group names.)
Be aware that with either of these methods, the currently selected permission in the adjacent drop-down is used for all collaborators specified.
- To either add more collaborators to this list or modify the permissions of other existing collaborators on the item, repeat from step 5 (above). Otherwise, continue on...
- ( Optional + only available when sharing a file and if one of your Organisation administrators has configured classifications for your current organisation ) In the Classification drop-down box, choose a predefined classification, where No classification is chosen by default. (Classifications allow you to restrict the ability to share files to specific clearance groups of Cocoon Data users.)
Notes:
-
If your organisation's policy requires you to assign a specific classification when sharing a file, then choose the appropriate classification for the type of content you are sharing. For example, (one of) your Organisation administrator/s may have configured the classifications: Confidential, Restricted/Protected and Unclassified for your current organisation. The default No classification option (which does not apply any classification) is also available as a choice when sharing the file.
-
If at least one of the specified collaborators is a contact group, then it is not possible to apply a classification to the file.
-
For more information about classifications and clearances, refer to Managing classifications / clearances in the Organisation Administrator's Guide.
Tip: If you only need to modify the classification on a file, you can do so quickly (without having to open the Share dialog box) by:
- Selecting the file from the items area of the main SafeShare page.
- In the File Details section of the Details tab to the right of the items area, choosing the required classification from the Classification drop-down. Be aware that if any existing collaborators on the file are not associated with your chosen classification (via clearance membership defined by an Organisation administrator), then you will receive a warning to this effect and be prevented from choosing that classification.
- ( Optional and also only available when sharing a file ) Define when your file can be accessed, by:
- Clicking the Sharing period link to access these options:
- Specifying a date and time in:
-
The Availability field, which defines when your collaborators can begin accessing your file. For immediate availability, leave this field blank.
-
The Expiration date (and time) field, which defines when your collaborators' access to your file ceases. For no expiration date and time, leave this field blank.
Tip: When editing these fields:
- Click inside the field (or the 'calendar' icon) to specify the date.
- Click the 'clock' icon to specify the time.
- Click the 'x sign' icon to clear to contents of the field.
- Any existing date and time values specified previously will be retained.
- Click Share/Update to complete sharing your item with your collaborators. An email notification is sent to all newly added collaborators on the Share dialog box.
Notes:
- If you receive the following warning messages, which prevents you from sharing your item:
- 'The whitelist feature is not permitting you to share this item with the following users: ... Please contact your administrator.' - (One of) your organisation's SafeShare Organisation administrator/s has enabled the user whitelist feature, which restricts the people (who have permission to access your organisation on the Cocoon Data Platform) to those whose email addresses (or email address domains) have been added to this whitelist feature. You may need to contact an Organisation administrator to clarify which people's email addresses and domains have been 'whitelisted' to ensure that when sharing an item (above), any non-whitelisted collaborators have either been removed or have not been added to your list of collaborators.
- 'The following user/s do/es not have access to CLASSIFICATION files:' (where 'CLASSIFICATION' is the name of the classification you selected above) - (One of) your organisation's SafeShare Organisation administrator/s has not permitted the users listed in the warning message with access to content shared with the applied CLASSIFICATION. Either remove these users who are not permitted to access content shared with the applied CLASSIFICATION, or choose a different classification.
- For more information about the user whitelist and classifications (+ clearances), please refer to the Organisation Administrator's Guide.
- It is also possible to 'unshare' your secure content (i.e. remove collaborators from this content). For more information, see Unsharing secure content.
Additional tips:
- To share multiple files with one or more people, create a folder and share it with one or more collaborators using this procedure (above). Any items that you or a collaborator (with Create, Manage or Co-Owner permissions on this folder) subsequently upload to this folder are immediately shared with all current collaborators on the folder. If, however, any collaborators and their permissions are modified on any item in this folder (i.e. any subfolder or file contained within of this folder), then these modifications will override these collaborators and their permissions which had been set on this (i.e. ancestral) folder.
- You can send a SafeShare email notification or a custom email message to all (or a subset of) current collaborators on your item via these mechanisms:
-
To send a SafeShare email notification to all/a subset of current collaborators on an item:
-
Ensure the item has been selected on the main SafeShare page.
-
In the Sharing and Permissions section of the Details tab, click the 'Notify' icon
alongside:
-
Notify Collaborators, which opens the Notify Collaborators dialog box with the current collaborators on the item specified in the Collaborators field on this dialog box, or
-
an individual collaborator's email address, which opens the Notify Collaborators dialog box with only this collaborator's email address specified in the Collaborators field.
Notes:
-
This dialog box contains a non-editable Link field, whose content contains a direct URL to the item in SafeShare for Web (3) (and will be included in the email notification sent to the specified collaborators).
-
If you clicked the 'Notify' icon
next to Notify Collaborators, you can remove one or more individual collaborators by clicking the x icon next to the email address of each collaborator to be removed. (Removing the last collaborator closes this dialog box.)
-
In the Notify Collaborators dialog box's Message (optional) field, type an optional message.
-
Click the Send button to send an email notification to all selected collaborators. This notification contains a link to the item and instructions on how to access the item.
-
To send a custom email message to all/a subset of current collaborators on an item using an external email client application running on your computer, such as Windows Live Mail, Apple Mail, Thunderbird, etc:
-
Ensure the item has been selected on the main SafeShare page.
-
In the Sharing and Permissions section of the Details tab, click the 'Email' icon
which launches a new email message (through your computer's email client application), whose:
-
To: field is pre-populated with the current collaborators on the item,
-
Subject: field contains the item's name and
-
First line of the email notification's body contains a direct URL to the item in SafeShare for Web (3) .
You can remove individual collaborators from the To: field through your email client application's usual message editing features.
(3) For file formats that SafeShare's content viewer supports, this URL opens the item in the content viewer as opposed to the items area of the main SafeShare page (which lists the item).
Uploading content to share through another user's folder
If a Cocoon Data user who owns a folder has:
then you will be able to securely upload content to share through this Cocoon Data user's folder. Any content you upload to this folder:
- implicitly inherits the same permissions you were granted on the folder,
- becomes available to other Cocoon Data users who are also collaborators on this folder (where these collaborators can be identified under the Sharing and Permissions section on the Details tab when selecting this folder) and
- becomes the ownership of the user who shared the folder with you.
Note: Like uploading personally owned content (above), this feature is only supported when using SafeShare for Web on a desktop/laptop computer. Uploading is not supported through web browsers on tablets, phones or other similar devices. (To upload content through these types of devices, please use the appropriate dedicated app for the device.)
To determine if you do have permission to upload content to another user's folder (or additionally manage content within it):
- Ensure you are signed in to SafeShare for Web.
- If the Home icon at the top-left (followed by your current organisation's name) has no drop-down icon indicated, then you are a member of only one organisation. Therefore, you can skip to the next step.
Otherwise, the name of your current organisation is indicated, from which you can either:
- skip to the next step to continue working with items in this organisation, or
- work with items in a different organisation (you are a member of) by changing your organisation before continuing on.
- If available, click the All files/filter (left-side of the toolbar near the top of the page) and ensure the Shared with me filter is chosen to show only items which other Cocoon Data users have shared with you in the items area.
Note: If your user account does not have the Originator role, then the All files/filter (i.e. for filtering items) is not available.
- Select the folder in the items area and if the Access field's value in the Folder Details section of the Details tab to the right of the items area indicates Create, Manage or Co-Owner, then the folder's owner has granted you these respective permissions to this folder. On this folder:
- Create permissions allow you to upload files (and new versions) to the folder, including any subfolders on which you also have Create permissions, as well as create subfolders within these folders.
- Manage permissions grant you the same permissions on the folder and its contents that Create permissions do, as well as the ability to:
- rename and remove items contained within this folder, as well as the folder itself, including any subfolders on which you also have Manage permissions, and
- move items contained within this folder between subfolders on which you also have Manage permissions.
- Co-Owner permissions grant you all the same permissions on the folder and its contents that Manage permissions do, as well as the ability to share the folder and any items contained within this folder on which you also have Co-Owner permissions.
To upload content to share through this other user's folder:
- Ensure you are signed in to SafeShare for Web, are in the appropriate organisation and have identified another Cocoon Data user's folder which you are a collaborator on and have permission to upload content to.
- Click this other user's folder to enter it.
- Select one or more file/s on your desktop/laptop computer and drag and drop them onto the items area of the main SafeShare page, similar to step 3 of Uploading and storing personally owned content (above). A graphic with the accompanying 'Drag and drop files here to upload' message appears over this area, indicating that SafeShare for Web is ready to upload the file/s.
Tips:
- Once you have entered this other user's folder, you can also upload one or more file/s by clicking the Upload button (left-side of the toolbar near the top of the page) and then selecting the file/s from your computer.
- For any subfolders contained within this folder (which you also have Create, Manage or Co-Owner permissions to), you should be able to drag and drop file/s over these subfolders to upload these files directly into these subfolders. If not, then it is likely that the owner has modified your permissions to these subfolders (since granting you permission to the parent/ancestral folder).
- The 'Uploads in progress' icon
(in the top header bar) indicates the number of files currently being uploaded to storage managed by the Cocoon Data Platform. Be aware that files are encrypted before they are actually stored.
-
While files are being uploaded, you can view and/or cancel any files whose uploads are still in progress as follows:
-
If required, click the 'Uploads in progress' icon to view the files currently being uploaded:
-
In the pop-up, click the x icon next to the files whose uploads you wish to cancel (or Cancel all to cancel all file uploads mentioned in this pop-up).
Tip: To close this pop-up, click its Hide button or somewhere outside the pop-up.
Note: This 'view uploads/downloads and/or cancel' feature works best with large file sizes. If your files are small, you may not have sufficient time to use this feature.
Once the upload process is complete, the content is securely stored by SafeShare within the other user's folder (in the current organisation).
Notes:
- The storage space allocated to the Cocoon Data user whose folder you uploaded your content to is used to store this content.
- All collaborators on this folder (as specified by its owner) will gain access to the content you uploaded (based on each collaborator's permissions on this folder).
- If you attempt to upload a file whose name matches that of an existing file (you have Manage* or **Co-Owner permissions on) at a given location, you may be prompted with the File Already Exists message box, which requests whether or not to upload a new version of that file. Clicking Yes proceeds with uploading the new file version. See Managing file versions for more information.
Notes:
- If the file you are uploading a new version of is located at your main SafeShare page's root level, then you cannot use drag and drop to perform this action. Instead, upload a new version of this file through the file's version management page.
- If you choose the Always upload a new version check box on the File Already Exists message box before clicking Yes, then dragging and dropping a new file whose name matches that of an existing one will always directly upload a new version (i.e. bypassing this message box).
- When uploading one or more files to the other user's folder, as upload proceeds, one (or more) of these files may fail uploading three times, followed by you receiving the message 'Upload failed'. This means that a file with the same name exists at this location. However, you will not be able to see this file because you are not a collaborator on it for one of the following reasons:
Additional tip: As a collaborator on an item (including content you have uploaded to another user's folder), you can send a SafeShare email notification or a custom email message to all (or a subset of) other collaborators currently on the item (including the item's owner) via these mechanisms:
-
To send a SafeShare email notification to all/a subset of other collaborators currently on an item (as well as the item's owner):
-
Ensure the item has been selected on the main SafeShare page.
-
In the Sharing and Permissions section (only accessible if you have Create, Manage or Co-Owner permissions on the item) of the Details tab, click the 'Notify' icon
alongside:
-
Notify Collaborators (4) , which opens the Notify Collaborators dialog box with all other collaborators currently on the item specified in the Collaborators field on this dialog box, or
-
an individual collaborator's email address, which opens the Notify Collaborators dialog box with only this collaborator's email address specified in the Collaborators field.
Alternatively, click the 'Notify' icon
in the Owner Details section to send an email notification to the item's owner only.
Notes:
-
This dialog box contains a non-editable Link field, whose content contains a direct URL to the item in SafeShare for Web (5) (and will be included in the email notification sent to the specified collaborators).
-
If you clicked the 'Notify' icon next to Notify Collaborators (4) , you can remove one or more individual collaborators by clicking the x icon next to the email address of each of these people to be removed. (Removing the last email address closes this dialog box.)
-
In the Notify Collaborators dialog box's Message (optional) field, type an optional message.
-
Click the Send button to send an email notification to all selected collaborators. This notification contains a link to the item and instructions on how to access the item.
-
To send a custom email message (4) to all/a subset of other collaborators currently on an item using an external email client application running on your computer, such as Windows Live Mail, Apple Mail, Thunderbird, etc:
-
Ensure the item has been selected on the main SafeShare page.
-
In the Sharing and Permissions section of the Details tab, click the 'Email' icon
which launches a new email message (through your computer's email client application), whose:
-
To: field is pre-populated with all other collaborators currently on the item,
-
Subject: field contains the item's name and
-
First line of the email notification's body contains a direct URL to the item in SafeShare for Web (5) .
You can remove individual email addresses from the To: field through your email client application's usual message editing features.
(4) These features are only available on items with two or more collaborators.
(5) For file formats that SafeShare's content viewer supports, this URL opens the item in the content viewer as opposed to the items area of the main SafeShare page (which lists the item).