Finding secure content
SafeShare for Web provides the following mechanisms for locating files and folders within your organisation:
While these features work with items in your current organisation only, they become useful as increasingly more items are added (either by yourself or shared with you by other people) within your organisation/s.
To search for (a) specific item/s:
- Ensure you are signed in to SafeShare for Web.
- If the Home icon at the top-left (followed by your current organisation's name) has no drop-down icon indicated, then you are a member of only one organisation. Therefore, you can skip to the next step.
Otherwise, the name of your current organisation is indicated, from which you can either:
- skip to the next step to continue with searching for an item from this organisation, or
- search for an item from a different organisation (you are a member of) by changing your organisation before continuing on.
- In the search box at the top-right of the main SafeShare page,

do either of the following:
-
Conduct a simple search using the Search items field. Do this by:
-
Typing a series of characters contained in any of these item's fields:
-
Name
-
Owner's email address
-
Owner's first or last name
-
Typing the 'Enter/Return' key or clicking the search (i.e. magnifying glass) icon to the right of the search box. The list of items in your organisation is filtered according to those whose name, owner's email address or owner's first/last name contains the subset of characters entered in this search box. Clicking x to the right of the Search items field clears this field.
-
Conduct an advanced search by clicking the drop-down icon to the right of the search box, which opens the advanced search pop-up box. Begin your advanced search by:
-
Specifying/selecting any of the following search criteria:
-
The item's file name (Item name).
-
The extension of the item's file name (File type).
-
The Owned by me check box. (Selecting this check box disables the Owner field.)
-
Any part of the email address of the item's Owner. This field only works with items owned by people other than yourself. To find items owned by yourself only, select the Owned by me check box.
-
The Shared with me check box. (Selecting this check box disables the Shared with field.)
-
Any part of the email address of a collaborator on the item (Shared with).
-
Clicking Search. The list of items in your organisation is filtered according to those that matched the criteria which were specified in advanced search pop-up box. Clicking Reset clears all fields in the advanced search pop-up box.
Tips:
- To quit your search results, click the Exit search link near the top of the main SafeShare page. If you conducted a simple search (above), clicking the x to the right of the Search items field also quits your search results.
- You can widen the scope of your search results by selectively removing search criteria. To do this, locate Showing search results for near the top of the main SafeShare page and click the x to the right of each search criterion to be removed.
- You can also sort items on the main SafeShare page by clicking the name (in the column header) of the relevant field by which you would like to sort your items (with the exception of Location). Clicking a field name multiple times rotates through sorting the items (according to that field) in ascending, descending, followed by natural order (which is descending order by the item's Name field).
To filter items:
- Ensure you are signed in to SafeShare for Web.
- If the Home icon at the top-left (followed by your current organisation's name) has no drop-down icon indicated, then you are a member of only one organisation. Therefore, you can skip to the next step.
Otherwise, the name of your current organisation is indicated, from which you can either:
- skip to the next step to continue with filtering items from this organisation, or
- filter items from a different organisation (you are a member of) by changing your organisation before continuing on.
- Click the All files/filter (left-side of the toolbar near the top of the page) and from which one of the following can be chosen:
Choose the default All files option to show all items within your organisation you can access from the root level.
Notes:
- If your user account does not have the Originator role for your (current) organisation, then the All files (and other filters) drop-down will not be available because you do not have your own storage space to upload, securely store and share personally owned content within this organisation.
- If you upload and store files while the main SafeShare page displays the results of a search or filter (above), then your files are uploaded to the root level.
Organizing content with folders
To help organize files within your organisation in storage (managed by the Cocoon Data Platform), you can create folders, which also facilitates the ability to share multiple items of your securely stored content with a group of people.
To create a new folder:
- Ensure you are signed in to SafeShare for Web.
- If the Home icon at the top-left (followed by your current organisation's name) has no drop-down icon indicated, then you are a member of only one organisation. Therefore, you can skip to the next step.
Otherwise, the name of your current organisation is indicated, from which you can either:
- skip to the next step to continue with creating a folder in this organisation, or
- create a folder in a different organisation (you are a member of) by changing your organisation before continuing on.
- If you intend to create a subfolder within a folder (at the root level of your items area), then from the main SafeShare page, click through to the folder that will become the parent of the subfolder you wish to create.
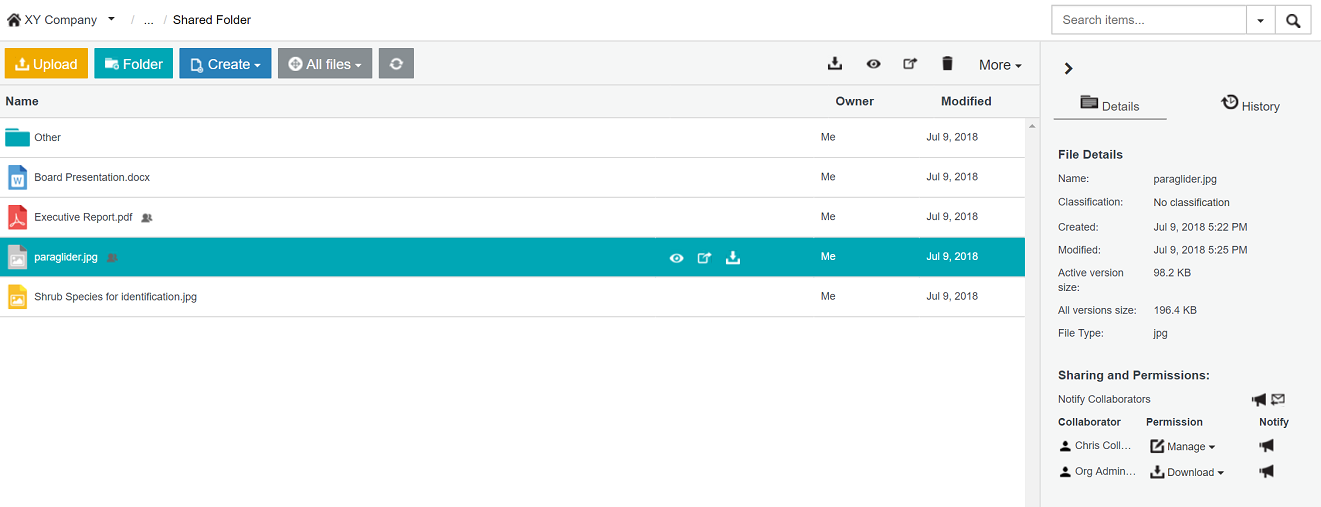
This parent folder could be a folder that you own, or a folder on which you are a collaborator with the Create, Manage or Co-Owner permissions. Once you have clicked through one or more folders, a breadcrumb (e.g.
) appears near the top, from which you can click the:
- The linked name of your current organisation to go to the root level/location of your items area.
- Ellipsis symbol ('...') to expand the entire folder hierarchy (i.e. to reveal Shared Folder in the example above), since only the root level and current folder locations (i.e. Other above) are indicated after each change in folder location.
- Link of a parent folder's name (i.e. Shared Folder from Other above) to go to that folder's location.
- Click the Folder button (left-side of the toolbar near the top of the page).
Note: If this button is not available, then either:
- your Cocoon Data user account does not have the Originator role for your organisation, or
- you are currently within another user's folder that you do not have the Create, Manage or Co-Owner permissions on (which in turn grants you the individual create new subfolders permission).
- In the Create new folder dialog box, specify the name of the folder.
- ( Optional and only for users who will immediately own the folder they are creating ) At this point, you can begin sharing this new folder with one or more collaborators by clicking the Add collaborators link. Doing so provides access to the Collaborators section of the Share dialog box, which can be used directly on the Create new folder dialog box (i.e. without you having to invoke the 'Share' dialog box in a separate action). Follow steps 5 through 8 of the Sharing secure content procedure to modify collaborators and their permissions on this Create new folder dialog box.
Notes:
- If you are creating a new subfolder within another user's folder, then the Add collaborators link will not be available, regardless of the permissions you have as a collaborator on this other user's folder. Therefore, if you have Co-Owner permissions on this other user's folder, create the new subfolder first and then begin sharing this subfolder in a separate action.
- The Current Collaborators list which appears on the 'Share' dialog box does not appear on the Create new folder dialog box. Due to implicit inheritance of collaborators and their permissions throughout a folder hierarchy, any existing collaborators on the parent folder will be able to access the new folder once it is created. Therefore, to identify these collaborators and their permissions, go up one folder level and select the parent folder in the items area to identify the existing collaborators in the Sharing and Permissions section of the Details tab on the right.
- Click Save to create the folder. The folder is created in the current items area within your organisation (and is shared immediately with any people you specified in the previous optional step).
To add content to a folder:
- Ensure you are signed in to SafeShare for Web, are in the appropriate organisation and if necessary, click through to the folder to add content to. (This must be a folder that you own, or one which you are a collaborator on with Create, Manage or Co-Owner permissions.)
- Do either of the following:
-
If the items area displays the contents of the folder to add content to, drag and drop one or more file/s onto the items area. A graphic with the accompanying 'Drag and drop files here to upload' message appears over this area (if not already shown), indicating that the file/s is/are ready to be added and uploaded to storage.
-
If the folder is visible in the items area, drag and drop one or more file/s over the folder (to which the files will be added). The folder highlights a different color to indicate that the file/s will be added to that folder instead (and uploaded to storage) rather than being added to the item area's current location.
Due to implicit inheritance of collaborators and their permissions on items throughout a folder hierarchy, you can also use these drag and drop methods to add files to any subfolders you are a collaborator on with the Create, Manage or Co-Owner permissions. For more information about uploading content to your items area, see step 3 of Uploading and storing personally owned content, as well as Uploading content to share through another user's folder.
Tips:
- If you are a collaborator on someone else's folder and have only been granted the View or Download permissions on this folder, then you will not be able to upload any files to that folder. See Sharing secure content and Uploading content to share through another user's folder for more information.
- You can filter your list of files and folders in the items area to show only your items that you have uploaded and securely stored by ensuring the My files filter is chosen from the All files/filter drop-down (top-left of the toolbar near the top of the page).
Unsharing secure content
'Unsharing' an item that you own or are a collaborator on (with Co-Owner permissions) effectively removes all or specific collaborators from the item and its contents.
Using SafeShare's Unshare feature on a folder removes all collaborators from not only this folder, but also all collaborators from every item contained within this folder (which had been set explicitly on these items). For more information about explicit versus implicit sharing, refer to the Note at the end of step 6 on selecting permissions for a collaborator (of the Sharing secure content procedure).
To unshare your securely stored content:
- Ensure you are signed in to SafeShare for Web.
- If the Home icon at the top-left (followed by your current organisation's name) has no drop-down icon indicated, then you are a member of only one organisation. Therefore, you can skip to the next step.
Otherwise, the name of your current organisation is indicated, from which you can either:
- skip to the next step to continue with unsharing an item from this organisation, or
- unshare an item from a different organisation (you are a member of) by changing your organisation before continuing on.
- To unshare:
- Personally owned content, locate the file or folder (that you own) in your current organisation to unshare.
Tip: To ensure you are only working with your own items in the items area, click the All files/filter (left-side of the toolbar near the top of the page) and ensure the My files filter is chosen.
- Content owned by another Cocoon Data user, locate this other user's file or folder in your current organisation to unshare.
Tip: To ensure you are only working with items that other users have shared with you as a collaborator, click the All files/filter drop-down in the toolbar near the top of the page and ensure the Shared with me filter is chosen.
- Do one of the following to begin unsharing this item:
- To remove all collaborators from the file or folder (including every item contained within this folder), either:
-
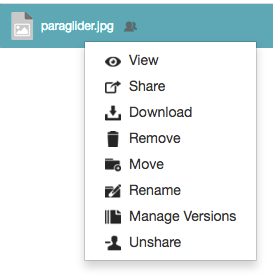
Right-click on the item's row and choose Unshare from the pop-up menu:
OR
-
Select the item, by clicking on the item's row (to the right of its name if a folder):
-
Click the More drop-down (right-side of the toolbar near the top of the page) and choose Unshare.
- To remove specific collaborators from this item, either:
-
Select the item.
-
In the Sharing and Permissions section of the Details tab on the right, locate the appropriate collaborators' names / email addresses and from their respective Permission drop-downs, choose Remove user.
OR
-
Right-click on the item's row and choose Share from the pop-up menu.
-
On the Share dialog box, click the Remove link associated with the collaborator/s to remove from this item.
-
Click Update to record your modifications on this dialog box.
If the item was a folder, only the specific collaborators who were removed are removed from this folder. Any collaborators set explicitly on any other items contained within this folder remain unaltered.
Note: If you unshare content owned by another user and you remove all collaborators (via the Unshare menu options) or you remove your own Cocoon Data user account (either from the Sharing and Permission section of the Details tab or the Share dialog box, whose net result is equivalent to removing your access to content shared with you), then you will lose the ability to subsequently access the Share dialog box for this content. To regain this access, ask the owner of the content (or another collaborator on it with Co-Owner permissions) to share this content with you again (with Co-Owner permissions).
Renaming an item
An item can be renamed if:
- you own the item or
- a Cocoon Data user has shared the item with you (as a collaborator) with either Manage or Co-Owner permissions on the item (which grants you the individual rename permission on the item).
To rename an item:
- Ensure you are signed in to SafeShare for Web.
- If the Home icon at the top-left (followed by your current organisation's name) has no drop-down icon indicated, then you are a member of only one organisation. Therefore, you can skip to the next step.
Otherwise, the name of your current organisation is indicated, from which you can either:
- skip to the next step to continue with renaming an item from this organisation, or
- rename an item from a different organisation (you are a member of) by changing your organisation before continuing on.
- Locate the item to rename.
- Do one of the following to begin renaming this item:
-
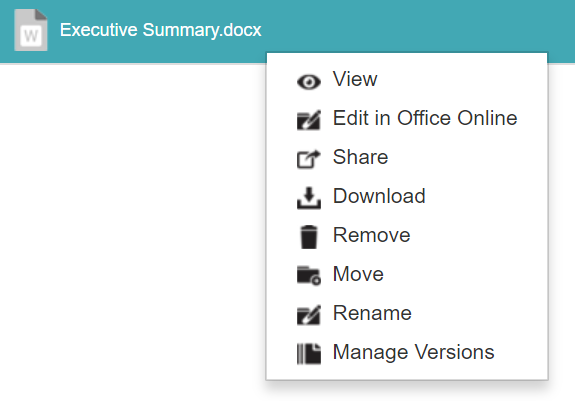
Right-click on the item's row and choose Rename from the pop-up menu:
Note: If this menu option is not available, then it is not possible to rename this item since you were not granted either Manage or Co-Owner permissions when the item (or one of its ancestral folders) was shared with you.
OR
-
Select the item, by clicking on the item's row (to the right of its name if a folder):
-
Click the More drop-down (right-side of the toolbar near the top of the page) and choose Rename. Note that this option will not be available if you are a collaborator on the item (see Sharing secure content) and you were not granted either Manage or Co-Owner permissions on the item.
- In the Rename File/Folder dialog box, specify a new name for the item.
Note: If the item is a file, it is not possible to change the file name extension. Using SafeShare for Web, it is only possible to alter a file name extension before the file is uploaded to the application. Note that SafeShare for Windows may be used to alter file extensions after files have been uploaded.
- Click Save to complete renaming the item.
Moving an item
Files and folders (i.e. items) can be moved from one location to another, all of which are accessible from the items area of the main SafeShare page (within your organisation).
As a Cocoon Data user, you can move:
- An item that you own to another folder you own (or the root location of the items area).
- An item contained within a folder shared with you by another user (who granted you either Manage or Co-Owner permissions on this folder) to any subfolder of this folder. You require either Manage or Co-Owner permissions on the item being moved and the target folder to which you are moving the item - i.e. your permissions must not have been reduced on either the item being moved and the target folder.
Note: Although a Cocoon Data user may have granted you either Manage or Co-Owner permissions on two separate folder hierarchies, it is not possible to move an item from one of these folder hierarchies to the other.
Removing personally owned content
Removing a personally owned item which you or a collaborator had previously uploaded (using any SafeShare application), both:
- Removes this item from its current location to the Recycle Bin (known as 'recycling'), which is eventually deleted automatically and
- Prevents any collaborators on this item from being able to access it (unless you restore the item).
To remove a personally owned item:
- Ensure you are signed in to SafeShare for Web.
- If the Home icon at the top-left (followed by your current organisation's name) has no drop-down icon indicated, then you are a member of only one organisation. Therefore, you can skip to the next step.
Otherwise, the name of your current organisation is indicated, from which you can either:
- skip to the next step to continue with removing an item you own from this organisation, or
- remove an item you own from a different organisation (you are a member of) by changing your organisation before continuing on.
- Locate the personally owned file or folder (which you or a collaborator had previously uploaded/created).
Tip: To ensure you are only working with your own items in the items area, click the All files/filter drop-down (left-side of the toolbar near the top of the page) and ensure the My files filter is chosen.
- Do one of the following to begin removing this item:
-
Right-click on the item's row and choose Remove from the pop-up menu:
OR
-
Select the item, by clicking on the item's row (to the right of its name if a folder):
-
Click the 'Remove' icon
(right-side of the toolbar near the top of the page).
SafeShare for Web prompts you to confirm this removal and upon clicking Yes, your item and its content is removed from its current location and placed into the Recycle Bin. Any people you shared this item's content with will no longer be able to access the item (unless it is restored).
Tip: You can also remove multiple items by selecting two or more items from the items area (as you would for a single item above although hold down the 'shift'/'control'/'command' key to allow the selection of multiple items) and click the 'Remove' icon
in the toolbar area near the top of the page.
Removing content shared through another user's folder
You can remove an item (i.e. a file, a folder or one or more items within a folder) which has been shared with you by another Cocoon Data user who granted you either Manage or Co-Owner permissions on this item. Such an item could be one which the owner uploaded or someone else (including yourself) had previously uploaded and/or created through folders (using any SafeShare application).
Having the Manage or Co-Owner permissions on an item grants you the individual remove permission on the item itself and if the item is a folder, including any items contained within this folder (unless your permissions on any of these contained items have been explicitly changed).
Removing such an item, removes it from the owner's current location to the owner's Recycle Bin (known as 'recycling'), where this item is eventually deleted automatically. Any recycled item is effectively inaccessible, unless the owner restores the item.
To remove an item shared through another user's folder:
- Ensure you are signed in to SafeShare for Web.
- If the Home icon at the top-left (followed by your current organisation's name) has no drop-down icon indicated, then you are a member of only one organisation. Therefore, you can skip to the next step.
Otherwise, the name of your current organisation is indicated, from which you can either:
- skip to the next step to continue with removing an item from this organisation, or
- remove an item from a different organisation (you are a member of) by changing your organisation before continuing on.
- Locate either the file (which had previously been uploaded to another user's folder by its owner, you or someone else) or subfolder (created within another user's folder) to be removed.
Tip: To ensure you are only working with items that other Cocoon Data users have shared with you, click the All files/filter drop-down (left-side of the toolbar near the top of the page) and ensure the Shared with me filter is chosen to show only items (i.e. including folders) that other users have shared with you.
- Do one of the following to begin removing this item:
-
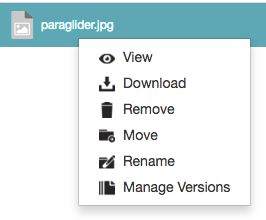
Right-click on the item's row and choose Remove from the pop-up menu:
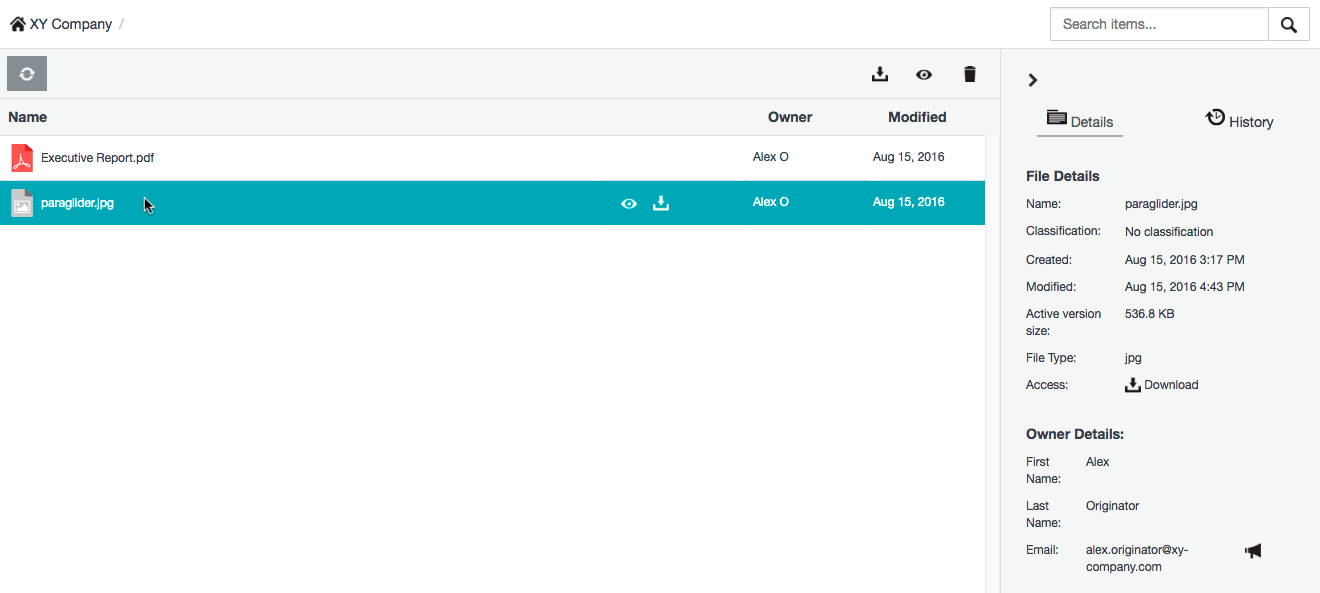
Note: If the Move and Rename menu options are absent (and Access within the File/Folder Details section of the Details tab does not indicate Manage or Co-Owner permissions), then you were not granted either of these permissions when the item (or one of its ancestral folders) was shared with you. Therefore, in this situation, proceeding with this action will instead only remove your access to this content.
OR
-
Select the item, by clicking on the item's row (to the right of its name if a folder):
-
Click the 'Remove' icon
(right-side of the toolbar near the top of the page). Note that if the More menu's Move and Rename options are absent (and Access on the Details tab does not indicate Manage or Co-Owner permissions), then you were not granted either of these permissions when the item (or one of its ancestral folders) was shared with you. Therefore, in this situation, proceeding with this action will instead only remove your access to this content.
SafeShare for Web prompts you to confirm this removal and upon clicking Yes, the item and its content is removed from its current location and placed into the owner's Recycle Bin. Any people who had access to this item's content will no longer have access to it (unless the owner restores it).
Removing your access to content (shared with you)
You can remove your access to an item (i.e. a file, a folder or one or more items within a folder) which has been shared with you by another Cocoon Data user who granted you View, Download or Create permissions on this item. Such an item could be one which the owner uploaded or someone else (including yourself) had previously uploaded and/or created through folders (using any SafeShare application).
Unlike the Manage or Co-Owner permissions, having only the View, Download or Create permissions on an item does not grant you the individual remove permission on the item itself and if the item is a folder, this would include any items contained within this folder (unless your permissions on any of these contained items have been explicitly changed).
Therefore, removing such an item only removes your access to this item and clears it from your items area. This action is similar to the owner (or a collaborator with Co-Owner permissions) unsharing or removing you as a collaborator from the item.
Note: After removing your access to items shared with you, the owner of these items (and anyone else they have been shared with) can still access these items from storage managed by the Cocoon Data Platform.
To remove your access to an item which someone else has shared with you through SafeShare:
- Ensure you are signed in to SafeShare for Web.
- If the Home icon at the top-left (followed by your current organisation's name) has no drop-down icon indicated, then you are a member of only one organisation. Therefore, you can skip to the next step.
Otherwise, the name of your current organisation is indicated, from which you can either:
- skip to the next step to continue with removing your access to an item from this organisation, or
- remove your access to an item from a different organisation (you are a member of) by changing your organisation before continuing on.
- Locate the file or folder (which someone else had previously shared with you using SafeShare for Web, including SafeShare for Windows, OS X, iOS and Android applications) from which to remove your access.
Tips:
- To ensure you are only working with items that other Cocoon Data users have shared with you, click the All files/filter drop-down (left-side of the toolbar near the top of the page) and ensure the Shared with me filter is chosen to show only items (i.e. including folders) that other users have shared with you.
- Select the item from which to remove your access and verify that Access within the File/Folder Details section of the Details tab does not indicate Manage or Co-Owner permissions. Otherwise, proceeding with the next step will instead remove this content.
- Do one of the following to begin removing this item:
-
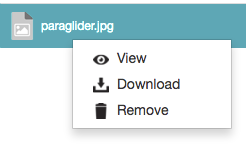
Right-click on the item's row and choose Remove from the pop-up menu:
Note: If the Move and Rename menu options are present, then you were granted either Manage or Co-Owner permissions when the item (or one of its ancestral folders) was shared with you.
OR
-
Select the item, by clicking on the item's row (to the right of its name if a folder):
-
Click the 'Remove' icon
(right-side of the toolbar near the top of the page). Note that if the More menu's Move and Rename options are present, then you were granted Manage or Co-Owner permissions when the item (or one of its ancestral folders) was shared with you.
SafeShare for Web prompts you to confirm this removal and upon clicking Yes, your access to this item is removed and the item is removed from your items area.
Accessing the Recycle Bin
The Recycle Bin is effectively a special folder/storage area, where files or folders you own have been removed (either by yourself or by a collaborator on these items).
Removing an item into the Recycle Bin is known as recycling.
Any collaborators' access to a shared item ceases as soon as the item is recycled. However, if any item within the Recycle Bin is restored, any collaborators who were on the item (prior to it being recycled) will regain the same level of access again * .
To access the Recycle Bin:
- Ensure you are signed in to SafeShare for Web.
- If the Home icon at the top-left (followed by your current organisation's name) has no drop-down icon indicated, then you are a member of only one organisation. Therefore, you can skip to the next step.
Otherwise, the name of your current organisation is indicated, from which you can either:
- skip to the next step to continue with accessing the Recycle Bin from this organisation, or
- access the Recycle Bin from a different organisation (you are a member of) by changing your organisation before continuing on.
- Click the All files/filter drop-down (left-side of the toolbar near the top of the page) and ensure the Recycle Bin option is chosen.
Your Recycle Bin's page and its content is displayed:
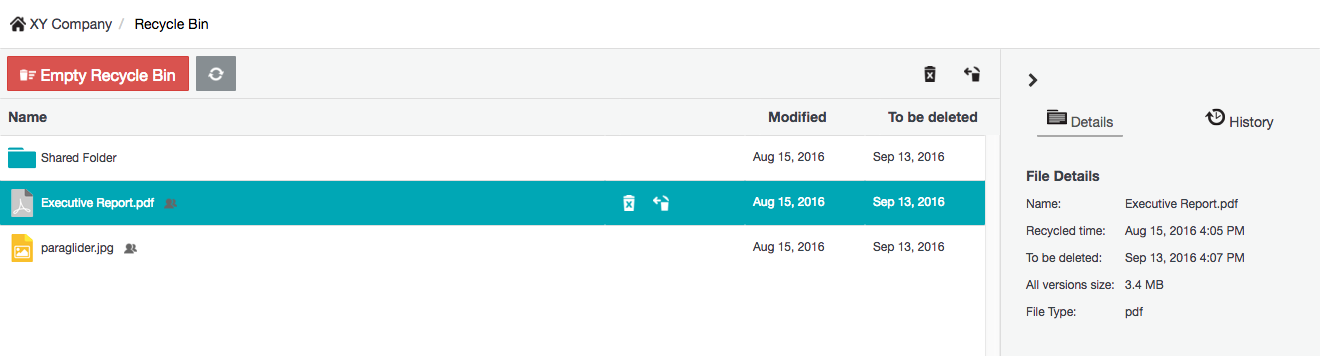
- From this page, you can:
- delete and restore items and
- click the 'Home' icon and/or your current organisation's name to return to the root level/location of your items area of the main SafeShare page.
Deleting and restoring content in the Recycle Bin
Deleting items from the Recycle Bin (which you or a collaborator had previously uploaded using any SafeShare application), both:
- Deletes these items from storage managed by the Cocoon Data Platform (which includes all versions associated with every file deleted) and also
- Permanently stops other people you have shared these items with from being able to access the items again.
Restoring an item from the Recycle Bin restores the item to its original location (i.e. from where the item was removed), along with the item's collaborators and classification, if these had been set prior to the item being recycled * . Any collaborators with whom the item had been shared (prior to it being recycled) will regain access to the item again.
Note: All items in the Recycle Bin are automatically deleted after 30 days.
To delete items in the Recycle Bin:
- Access the Recycle Bin page.
- If deleting:
-
A single item, do one of the following to begin deleting this item:
-
Right-click the item's row and choose Delete item from the pop-up menu.
OR
-
Hover your mouse pointer over the item's row (or select/click the item's row) and click the 'Delete item' icon
in its row or the right-side of the toolbar near the top of the page (for the selected item).
-
More than one item, select two or more items to delete from the Recycle Bin (as you would for a single item above although hold down the 'shift'/'control'/'command' key to allow the selection of multiple items) and click the 'Delete item' icon
at the right-side of the toolbar near the top of the page.
-
All items, click the Empty Recycle Bin button (left-side of the toolbar near the top of the page).
SafeShare for Web prompts you to confirm this deletion and upon clicking Yes, your selected items are deleted from storage (along with all versions associated with every file deleted).
Notes:
- This process, regardless of whether it is performed manually (above) or automatically after 30 days, frees up your storage. For more information about your storage usage, see Viewing your storage usages and quotas.
- The Recycle Bin's page (above) indicates the date (under the To be deleted column) when each item will be automatically deleted (i.e. 30 days from the time of the item's removal).
To restore an item from the Recycle Bin:
- Access the Recycle Bin page.
- Do one of the following to begin restoring an item.
-
Right-click on the item's row and choose Restore item from the pop-up menu.
OR
-
Hover your mouse pointer over the item's row (or select/click the item's row) and click the 'Restore item' icon
in its row or the right-side of the toolbar near the top of the page (for the selected item).
SafeShare for Web restores the item to its original location (i.e. from where the item was removed), including all of its content intact if the item were a folder. If the item itself (including any of its content) had collaborators and classifications prior to the item being recycled, then these collaborators and classifications are also restored * . Any collaborators with whom the item/s had been shared (prior to it being recycled) will regain access to the item/s again.
Notes:
- If a file or folder with the same name exists in the location to which the file/folder you are restoring will be placed, the Name Conflict dialog box appears, through which you must specify a different item name to complete restoring the item. For files, as is the case when renaming a file, it is not possible to change file name extensions through this Name Conflict dialog box.
- If the folder to which the item you are restoring has been removed or deleted, the Folder Missing dialog box appears, through which you must choose a different location or create a new folder (into which the item will be restored) to complete the action.
* If a file was shared with a Sharing period specified and subsequently recycled, then upon restoring this file, all collaborators and classification will be removed. This behavior occurs even if this file were located inside a folder that is recycled and then restored.