To manage your Cocoon Data user account through 'SafeShare for Windows':
- Ensure that SafeShare for Windows has been started and that you are signed in.
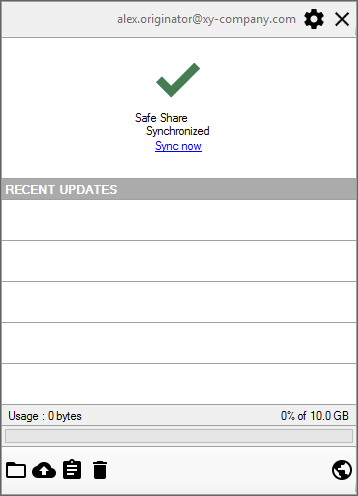
- Click the application's icon
in the taskbar notification area, then click the 'Settings' icon
at the top-right of the application pane ... :
and choose Account management from this icon's pop-up menu to open SafeShare for Web. (See Accessing the web application for more information.)
- After signing in to the web application (if necessary), the My Account feature of SafeShare for Web is displayed.
You can manage the following aspects of your Cocoon Data user account through the My Account feature of SafeShare for Web:
- Edit your Account Details such your first, last and other names, as well as your mobile number and default language settings.
- Modify your Security settings, such as your Two-factor authentication settings and Terminate all of your currently active (i.e. signed in) sessions with the Cocoon Data Platform. You can also change your Password through this feature. However, SafeShare for Windows allows you to do this through the application itself - see Changing your password below for details.
- View information about your last sign-in to the Cocoon Data Platform.
- View information about your remote storage usage and quota for each organisation you are a member of.
- Modify your Email Notification Frequency.
- Revoke passcodes set on registered devices. Currently, passcodes (used to rapidly authenticate a Cocoon Data user to the Cocoon Data Platform) are only supported on iOS and Android devices running their native SafeShare applications.
- Revoke the right that non-SafeShare-based client applications were initially granted by you to access the Cocoon Data Platform's resources through your Cocoon Data user account.
Changing your password
To change your password:
- Ensure that SafeShare for Windows has been started and that you are signed in.
- Click the application's icon
in the taskbar notification area, then click the 'Settings' icon
at the top-right of the application pane ... :
and choose Change password from this icon's pop-up menu to open the Change Password dialog box.
- Specify your old password and then your new password twice (once again to confirm it).
- Click the Change button and your Cocoon Data user account's password is now changed.
Note: If your Cocoon Data user account was created from a user directory which is external to the Cocoon Data Platform (i.e. you have an LDAP account type), then you will not be able to change your password through SafeShare. To change your password, please contact your Cocoon Data Platform's SafeShare administrator or the administrator responsible for managing LDAP or the user directory of your account.
Managing your contacts
Whenever you share content with other people, their email addresses are automatically added to your list of Contacts. This list makes it easier to specify these people as collaborators in the 'SafeShare' dialog box (using autompletion) the next time you share your content with them.
You can also manually add, edit or delete any of these personal contacts through SafeShare for Window's Contacts feature.
Note: Like the address book feature, which autocompletes the email addresses of any members of your current organisation in the SafeShare dialog box and is enabled by an Organisation administrator of your current organisation, your list of Contacts also autcompletes the email addresses of people you have added to this list. However, your Contacts are available for use in all organisations you are a member of. For more information about these features in the SafeShare dialog box, see Notes about the 'SafeShare' dialog box after the image of this step 3 of the Sharing secure content procedure.
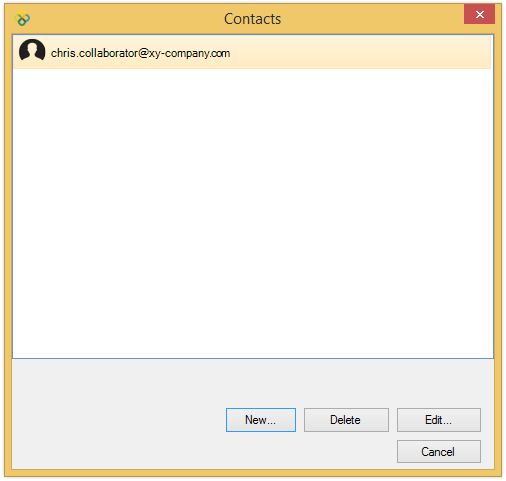
To access the 'Contacts' feature:
- Ensure that SafeShare for Windows has been started and that you are signed in.
- Click the application's icon
in the taskbar notification area, then click the 'Settings' icon
at the top-right of the application pane ... :
and choose Contacts from this icon's pop-up menu to open the Contacts dialog box:
To manually add a new 'Contact':
- Access the Contacts feature.
- In the Contacts dialog box, click the New button.
- In the resulting New Contact dialog box, specify an optional First Name and Last Name and mandatory Email Address fields.
- Click Save on this dialog box to add your new Contact.
To edit an existing 'Contact':
- Access the Contacts feature.
- In the Contacts dialog box, select the Contact's email address and click the Edit button.
- In the resulting Edit Contact dialog box, edit the optional First Name and Last Name and mandatory Email Address fields as required.
- Click Save on this dialog box to update your existing Contact.
To delete an existing 'Contact':
- Access the Contacts feature.
- In the Contacts dialog box, select the email address/es of the Contact/s to be deleted and click the Delete button.
- Verify the deletion on the Delete Contacts message box.
The contact's email address will no longer be available for selection when sharing your content.
To add multple contacts to the 'SafeShare' dialog box from the 'Contacts' dialog box:
- Access the Contacts feature.
- In the Contacts dialog box, select the email address/es of the Contact/s to be added to the SafeShare dialog box.
- Click the Choose Selected button, which closes the Contacts dialog box and returns you to the SafeShare dialog box, with these contacts added.
Note: Continue on with specifying the permissions that these contacts will have on the item you are sharing.